Showing posts with label Creativity. Show all posts

4.19.2010

Green

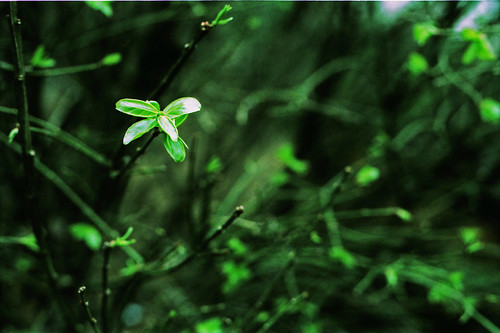
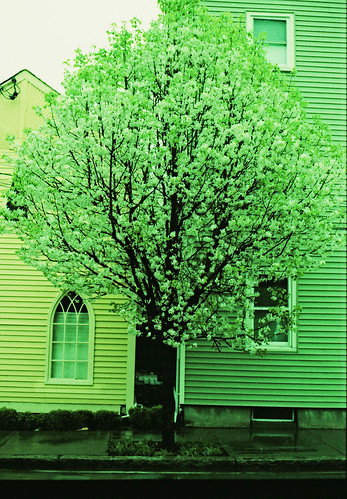
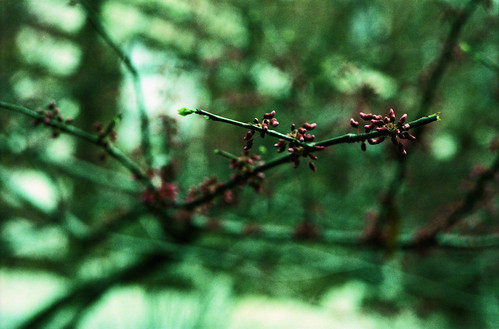
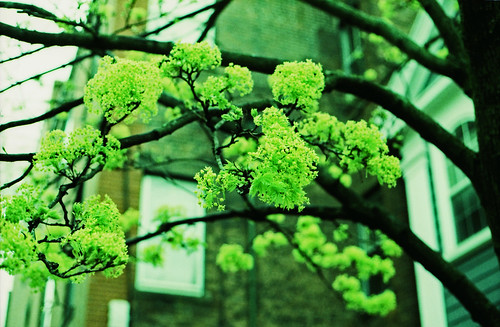
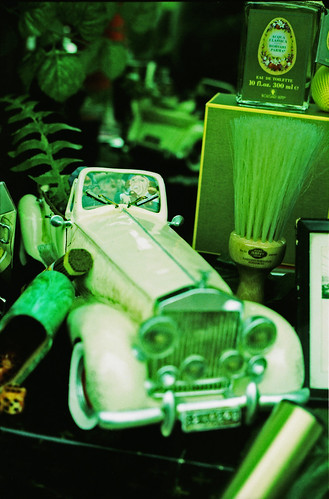
I love those days in early spring when the nascent leaves compensate for their small size and fragility with an aggressive, almost toxic, saturated yellow-green. Against that green the white and pink of little blooms also take on a greenish hue, almost as if trying to fit in with the leaves that will, soon, replace them.
Of course, all of a sudden early spring seems to have passed us by! A few days in the steamy almost-South where summer seems to be in full swing and coming back here I see that the blossoming trees are done and the daffodils are all gone. But the weekend was frosty and some tulips are flopped over, swooning from frost. In short, it's a typical New England spring.
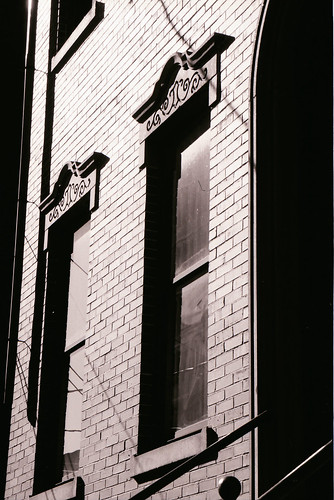
These shots are from my first-ever roll of cross-processed slide film (Fuji Velvia 50, if you were wondering). I'm pleased with the results, even if the green cast is much more pronounced than I really expected. It suits the spring. And Leavitt & Pierce's window.And my rather fetching orchid, which looks lovely in this light, I think.

*****

Also, not to make excuses, but it's been really busy around here, so I haven't been sharing anything with you all. Thanks to those of you that are still hanging around here. Keep the faith and we'll be back soon with more!

3.28.2010

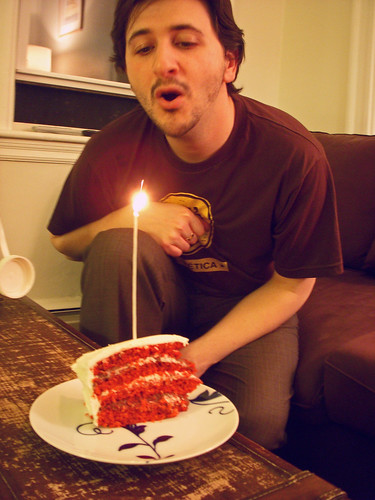
March Cake: Dan's Birthday

There's something you may not know about me. I am a very selfish sleeper. I hog the covers. I flail around and sprawl diagonally across the bed. I throw elbows and kick randomly in my sleep. Also, I snore and I drool and I sometimes talk in my sleep. I always said that if I ever got married, (which was such an improbability that surely I needn't even worry about it) I would want my own bedroom. We'd just be one of those (highly hypothetical) couples that didn't always sleep in the same bed and that would be fine!

Fast forward and suddenly I find myself married. When Dan and I began cohabiting I was very, very worried about the sleeping situation. I was horrified to discover that he's also a selfish sleeper. Nightly bouts of sleep tug-of-war over the covers and many bruised shins (and chins) ensued. I thought we'd either rip the covers in half in our sleep or inadvertently beat each other to a pulp drowsily vying for the perfect pike position. (And I'm not talking about diving - I'm talking about the most efficient way of utterly hogging the entire bed and ensuring your co-sleeper's discomfort.)But the strangest thing happened. Somehow it stopped being an issue; now we sleep in synchronized, parallel pike positions, one of us wrapped around the other. We still tug over the covers, but now I know to start the night with the covers pulled almost all the way over to my side to ensure that I'll still have some when I wake up in the morning. I still occasionally elbow him in the face and it turns out that he also occasionally talks (or grunts) in his sleep and somehow despite all this nonsense we sleep just fine, thank you very much. He must be a great guy (and handsome too!). After all, I wouldn't have adjusted my sleeping style for just anyone. I'm not that kind of girl.

Things you should know about Dan: He's a seriously talented writer, and rather fantastic at singer-song-writer-ing. Also, he has a way with finger pistols.
He's also just about the kindest, warmest, loveliest guy you could ever hope to meet. And he likes chocolate as much as I do.

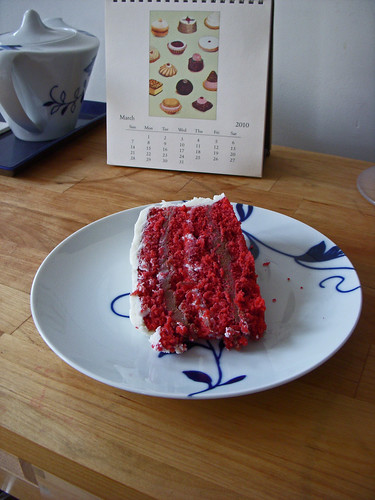
When I asked Dan what kind of cake he'd like for his birthday (which was last weekend) he said "Well, probably Red Velvet or Chocolate." (A wholly unsurprising answer.) I thought and thought about which to make, knowing that Red Velvet would crop up at some point in this year's cakestravaganza. I had a crazy idea and, despite hearing my mom saying in my head (as she does every time I express incredulity at the small amount of cocoa powder in our traditional Red Velvet recipe) "People always think Red Velvet Cake is a chocolate cake, but it's not," I decided to buck tradition, to flout Red Velvet orthodoxy and make a Red Velvet Fudge Cake. I also skipped the traditional cooked frosting recipe and topped it with Cream Cheese Frosting. The result was not your everyday Red Velvet Cake, but damn, it was a good cake.

A note on recipes: There are more different recipes for Red Velvet than you can shake a stick at. I've tried a LOT of them, but honestly, none beats the one I grew up on. The cake recipe I use comes from the East Columbus United Methodist Women's Cookbook (late 70s-early 80s), which was, I believe, a gift to my mom from my dad's mom. This cookbook is full of gems, but the Red Velvet recipe is clearly the best loved. In fact, when looking for the recipe, you can actually spot the page by looking for red stains. Not blood, but food coloring.
This is, in my opinion, the Definitive Red Velvet Recipe. Others contain more butter or more flour, less salt, more vinegar, less food coloring (I actually caved to this impulse and was NOT happy with the resulting color), and (sin of sins!) more cocoa. This is not, after all, a chocolate cake. Just trust me, here. Jean Wagner (East Columbus, ca. 1970) knew what she was talking about. It's a tangy, light, airy, perfectly-crumbed beaut.

This recipe has, incidentally, been the cause of much consternation for me - once I tried to ice a warm cake with the traditional cooked icing recipe, but the frosting melted and left clumps of the flour/milk paste sticking all over the cake (my mom's generous response: "I think you've got the cake texture down, but the icing could use a little practice.") Another time, I baked one of these for a boy I was desperately infatuated with and brought it to school for his birthday. On my way from the car to our lockers, the bottom of the container caved and the whole cake slid out and squished against my belly. Our school uniforms were white shirts and khaki pants, both of which show up red food coloring spectacularly.

But I come by it honestly! On another occasion that has since gone down in the family history books, my grandma was baking a Red Velvet Cake and left the vanilla out of both the cake and the icing. It was wretched.

For Frosting, I turned to Nancie McDermott's Southern Cakes. Her Cream Cheese frosting is gorgeous and her Old-Fashioned Chocolate Fudge Frosting seemed like a good fit for the fudge filling I desired. I'll admit, I had issues with the fudge. (See recipe below.) It didn't work the way it was meant to. So I slapped in some cream cheese and that did the trick.

With no further ado, here's what you need to do next time someone near and dear has a birthday.

Red Velvet Cake
  • 1/2 c. butter, softened
  • 1 t cocoa (I think I put 2 t because surely, 1 can't be enough - sorry mom)
  • 1 1/2 c sugar
  • 1 t salt
  • 1 t vinegar
  • 1 t baking soda
  • 2 oz. red food coloring (you can use 1 oz, but it won't be nearly bloody enough)
  • 2 whole eggs
  • 1 t vanilla
  • 2 1/4 c sifted flour
  • 1 c buttermilk
  1. Preheat oven to 350.
  2. Mix vinegar and baking soda and let settle.
  3. Beat butter, cocoa, sugar, salt, and vanilla until light and fluffy.
  4. Add eggs and beat until incorporated.
  5. Add food coloring and mix until incorporated. (A note, if you're doing this with a mixer - either hand or stand - be VERY careful to begin mixing at a low speed. Otherwise you'll have a red-splattered everything.)
  6. Add flour and buttermilk alternatively, about a third each time.
  7. Fold in the baking soda and vinegar.
  8. Divide between two 9" round pans and bake for 30-35 minutes.
  9. Let cool in pans for about ten minutes, then invert onto racks to cool.
  10. When thoroughly cooled, use a long serrated knife to divide each layer into two.
  11. Assemble using desired frosting.
Cream Cheese Frosting (adapted from Southern Cakes)
  • 8 oz cream cheese, softened
  • 1 lb powdered sugar
  • 2 t vanilla
  1. Beat until combined and fluffy.
Chocolate Fudge Frosting (adapted from Southern Cakes)
  • 1 1/2 c sugar
  • 1/4 c cocoa
  • 1/4 t salt
  • 1/4 c butter (1/2 stick)
  • 1/2 c evaporated milk or half-and-half (I used Heavy Cream - was this my mistake?)
  • 1 t vanilla extract
  • ~3 oz cream cheese (my addition)
  1. In a heavy saucepan, combine sugar, cocoa, and salt. Mix well.
  2. Add butter and milk (cream) and heat to melt. Mix into smooth brown sauce.
  3. Stir well and bring to lively boil.
  4. Maintain gentle boil for five minutes. When frosting begins to thicken, remove from heat.
  5. Stir in vanilla and set aside to cool for 20 minutes.
  6. Beat the frosting until it thickens and looks shiny. This never happened for me - it was a little grainy. Maybe the sugar didn't completely dissolve or something?
  7. I beat it until it was entirely cool and slightly bigger in volume than before. Then I beat in the cream cheese until it was fluffier and spreadable and went to town.
Cake Assembly:My cake went, from bottom to top: cake, fudge, cake, cream cheese frosting, cake, fudge, cake, cream cheese frosting on top. Top with candle, sing, and make a wish!
**The fudge did make the cake a lot uglier, but it also make it taste spectacular.

3.16.2010

Mini Apple Pies: Ratio-izing my kitchen

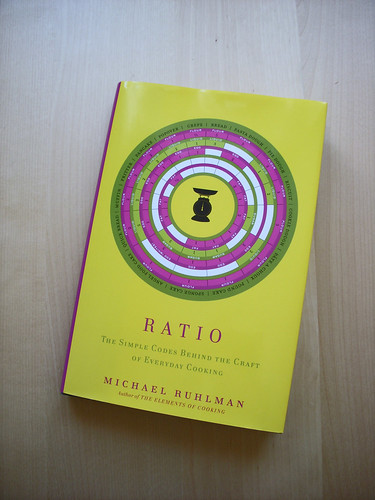
I'm always reluctant to accept compliments on my cooking if I've cooked from a recipe. I mean, It's one thing to be able to follow a recipe and another entirely to be able to make a recipe or to cook entirely without one. Right? Usually when I wholly depart from recipes, it's while cooking something like a stew or a dish that resembles something I've made before. When it comes to baking? Oh, hell no.However, I've been wanting to learn a little more about how recipes work so that I can start to make my own. You all probably know where this is going, but a few weeks ago I got the book Ratio by Michael Ruhlman, which is basically the key to understanding how recipes work. It's kind of amazing. I mean, once you know the ratios, you can create whatever you want? No, it's not like you're working entirely without a recipe, but it does give you a nice feeling of freedom to not be slinging flour over your prized cookbooks and to be able to improvise a little - riff, even.
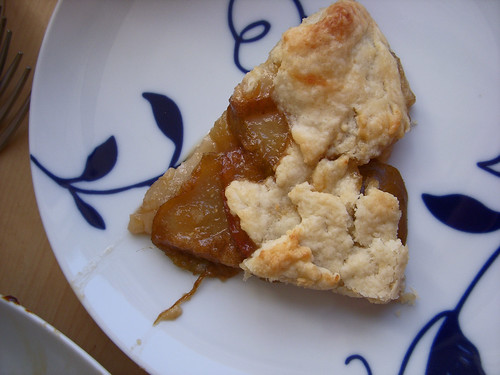
The first riffing I tried was a free-form pear tart. I used the 3:2:1 pie dough with a little added sugar and salt. It was a little tender for such a large tart and maybe should have been baked a little longer. However, for the mini apple pies I made last night, it worked perfectly. The crust puffed up and browned beautifully. It was sturdy, but flaky. Buttery and delicious. The filling? Also delicious, and I made it up on the fly! The apples cooked down to practically nothing and the butter mixture bubbled and, where it escaped the pie shells, caramelized on the pan.

The funny thing is that these little pies tasted familiar. I couldn't place the taste immediately, but I think what I recognized was the taste of McDonald's apple pie, but without the chemical aftertaste or the gumminess. I wouldn't usually liken my own cooking to McDonald's and mean it favorably, but in this case, I'm sure you'll all agree that it's a good thing. A very tasty, buttery, sweet, very good thing.

Try making these - you won't regret it. Oh, also, buy this book and keep the ratios posted somewhere handy in your kitchen. It doesn't seem that they'll fail!Mini Apple Pies

Crust:
  • 3 parts flour : 2 parts fat : 1 part water (12 oz. flour : 8 oz. butter : 4 oz water by weight)
  • pinch salt
  • 1T sugar
  1. Using a food processor, mix sugar, salt and flour.
  2. Add chilled butter, cut into chunks and process until mixture is crumbly.
  3. Pulse while drizzling water. You may not need all of it.
  4. Makes enough dough for 2 pies or free-form tarts or 8 mini tarts.
  5. Divide and chill dough.
  6. For mini pies, divide dough into 8 equal pieces. Roll each into a ball, flatten and roll out to 1/4" thick. (You can also reserve part of the dough for a later use - these mini pies were made from the leftovers from an earlier free form tart.)
Filling:
  • 1 Apple, peeled, cored, quartered, and sliced thinly
  • 2 T butter
  • pinch salt
  • 1/4 c dark brown sugar
  • 1 t vanilla
  • 1 t cinnamon
  1. Smoosh (that is the best word for it) the butter, brown sugar, cinnamon, salt, and vanilla together in a small bowl. A fork does a good job of this.
  2. Place dough rounds on a baking sheet (I used a half sheet with silpat).
  3. Place 1/4 of the apple slices overlapping in the middle of the dough rounds.
  4. Spoon 1/4 of the butter/sugar mixture on top of the apple slices.
  5. Fold the sides of the dough into the middle, crimping all the open edges with your fingers to seal the filling in.
  6. Use a knife to cut slits in the top of the dough to allow steam to escape.
  7. Bake at 425 for about 20 minutes (check frequently) or until crust is golden brown. (Seriously, watch closely because I forgot to time the baking.)
  8. Let cool on baking sheet for ten minutes before removing with a spatula.
  9. Serve warm (optional: these would be amazing with a dollop of whipped cream or a small scoop of ice cream).

2.09.2010

Tuesday clip show

.......................................................................................

It was a takeout night tonight, so I haven't got any recipes to share. Instead, here are some photos. I've been spending a good deal of time developing and tweaking photos the last few days, which is always very satisfying. Most enjoyable was the opportunity to take some adorable baby photos (My friends' adorable little girl turned 1 on Sunday).

Regular programming should resume soon. Beginning of the semester is always rough, but this one has been murder.

2.08.2010

Monday clip show: December roll

Yesterday I developed film for the first time in a LONG time. Here are some shots from a random December roll of film. Kodak TMax 100. Sprint chemistry. Lovely fine grain. I'm going to attempt to make this (developing and photo posting) a regular habit. No point in letting chemistry sit around and go bad. Also, it's a big part of the New Creativity. Fig. 1. Dan at Hi Rise Bakery in Harvard Square. This is the face he makes when he's confused why I'm taking a picture AGAIN.
Fig. 2. This is one of a row of stately houses across from the courthouse on 3rd Street, very near our house. It was Saturday morning and we were on our way to our breakfast haunt when the winter sun caught my eye.
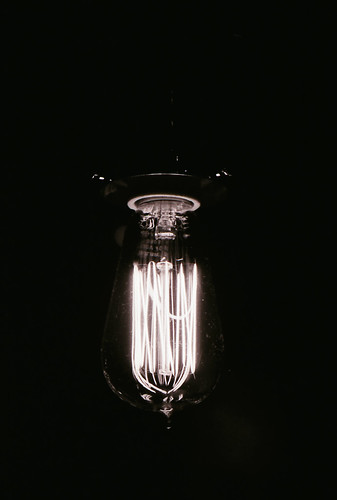
Fig. 3. A lightbulb at Lord Hobo. Go there and try the Soylent Green.
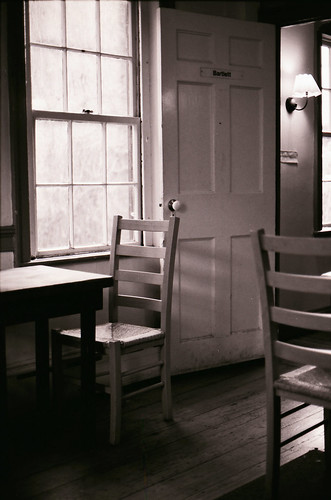
Fig. 4. Hi Rise again. Lovely soft light and many-textured wood as far as the eye can see.

1.28.2010

Another ugly, but delicious dinner

Before we start, Happy Birthday to my dear mother! Go read her brand-new baby blog!

I got this great present for Christmas
- my mom and I both have copies of 660 Curries and I was lamenting just before the holidays that I wanted to cook more things from it, but I never have the right spices on hand (or enough cash in hand to stock up). So my parents made a list of all the spices I could need, went to Penzey's and stocked up for me. It was a truly inspired gift.

Anyway, this gift was given to me on condition that I start cooking more of the curries, so over the last month, Dan and I have been cooking our way through the book, trying at least five new curries since we got back early this month. All the recipes have been delicious (with one notable exception, where I somehow went awry with the salt, but we won't get into that), but the most interesting thing has been getting more familiar with the taste of all the spices and how they fit together.

Last night we found ourselves in a bare-cupboard situation and I decided to make our traditional bare-cupboard dinner of lentil stew. We did, luckily, have beautiful vegetables that arrived in our Boston Organics box yesterday, so I threw in a few of them and let myself be sort of inspired by a recipe in the Curry Book. I didn't follow the recipe completely, as I didn't think to consult a recipe until after I started the lentils.

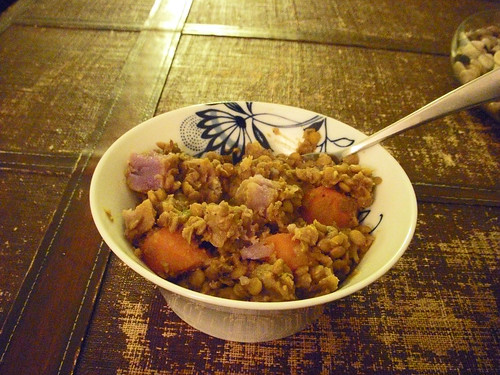
The result was a very delicious spicy, curry-y lentil stew which stood on its own and satisfied both of our very hungry stomachs with aplomb.

So far, I've used prepared spice mixes for most of the curries (I have three different garam masalas that I've been using), but I think this weekend I'll be spending some time making my own ginger paste, grinding up some of my own spice mixes, and maybe even making some spiced tomato sauce, so that I can actually sample the precise flavor profile of some of these recipes. I used to be so intimidated by cooking curry, but this book makes it totally manageable. If you're at all remotely inclined to cook curry, buy this book.

Spicy Indian/American Lentil Stew
Inspired by Five-Lentil Stew with cumin and cayenne - Panchmela Dal in 660 Curries by Raghavan IyerI call it Indian/American because I started off with the onion/carrot/celery combination that I would use to start any old American soup or stew, but ended with an Indian-inspired spice profile. I say spicy because I added cayenne twice. I'm not sure that was necessary. Feel free to dial it back to 1/8 t both times or just 1/4 t in the butter sauce at the end.

For the lentils
  • 1 small red onion, chopped finely
  • 1 stalk celery, chopped finely
  • 2 carrots, peeled and cut into 3/4 inch chunks
  • about a cup of dried lentils
  • 4 cups chicken broth
  • 1/2 t ground turmeric
  • 1 t grated fresh ginger
  • 1/4 t cayenne pepper
  • salt to taste
  • 4 fingerling (or 1 large) potatoes (I used purple ones!)
For the baghaar*
  • 2 T butter (ghee if you have it)
  • 2 dried bay leaves
  • 1 t garam masala (I used the garam masala I bought at Christina's)
  • 1 t cumin seeds
  • 1/4 t cayenne pepper
  1. Heatsome olive oil in a Dutch oven. When it's shimmering, add the onion, celery, and carrots. Saute until vegetables soften.
  2. Add the lentils (washed and picked over) and broth to the vegetables and bring to a boil.
  3. Stir in a little salt, the turmeric, ginger and cayenne.
  4. Reduce heat, cover and let simmer for about 30 minutes.
  5. When the liquid is mostly absorbed and the lentils are mostly softened, start the baghaar.
  6. Melt 2 T butter (or ghee) in a small skillet.
  7. Add cumin seeds, bay leaves, garam masala, and cayenne pepper.
  8. Reduce heat to medium and stir while the spices sizzle. When the cumin seeds turn dark reddish brown and start to smell toasty, remove from the heat. (Be very careful - it is EASY to burn the spices, which causes an unholy stink. Trust me.)
  9. Stir this mixture into lentils, add salt to taste and serve.
*my Curry Book tells me this is what it's called when you sizzle spices in ghee (butter in my case) to add to the dish at the last minute.

12.11.2009

December, Day 11: Party Prep Day 1

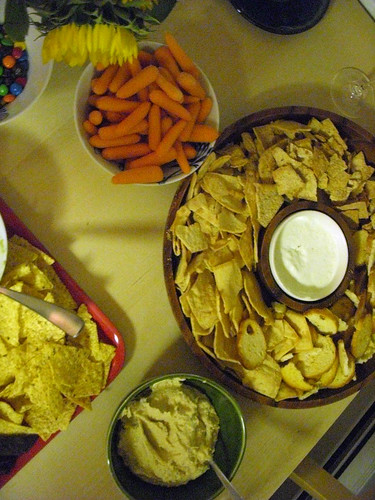
Getting myself and my kitchen ready for guests tomorrow. If you're not coming, now would be the time to start feeling sorry for yourself. Tonight I've...
  1. Made Vanilla Caramel - which will be cut into tiny bites and dipped into chocolate tomorrow.
  2. Made Cookie Dough for Bowtie Cookies - to be assembled and baked tomorrow.
  3. Made Cookie Dough for Ginger Sandwich Cookies - to be baked and assembled tomorrow. (This dough is disconcertingly wet... we'll see how they work out.)
  4. Started the St. Cecilia's Society Punch - lemons macerating in brandy, green tea syrup made.
  5. Made puff-pastry cheese straws.
Things to do tomorrow:
  1. Bake/assemble cookies.
  2. Finish punch.
  3. Bake one or two tarts (orange and maybe cranberry).
  4. Bake gougeres.
  5. Make a batch of benedictine.
  6. Set up the house.
Totally doable, right? Oh, and I'm going to a Latke party at 2 PM. Hm. Early morning, perhaps.

12.04.2009

December, Day 4: Ho, ho, ho!

Today is my day of birth, as some of you know, and I'm out celebrating. But I thought I'd leave you with a couple of the gifts I'm sending out to the Euorpean contingent - Wiebke, shut your eyes! (Not really. You already know about this one.)
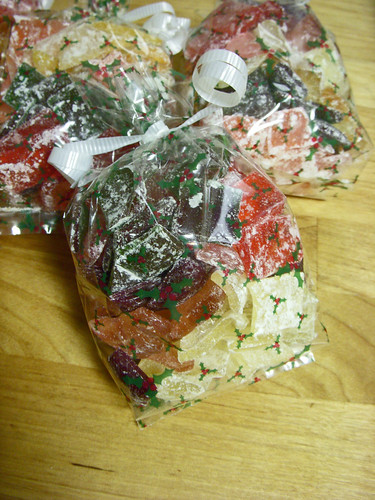
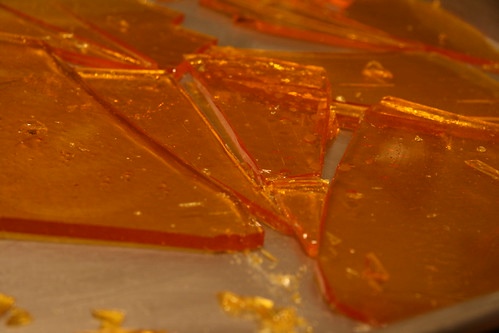
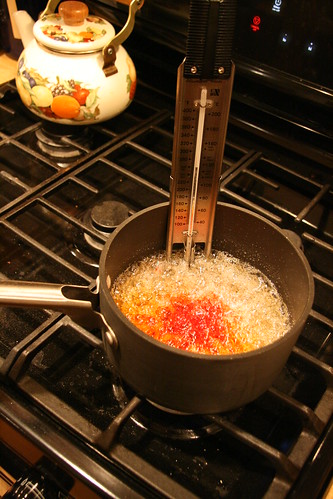
While I was home over Thanksgiving, I was struck by a mood. My mom took me to the cake decorating store (!) and I ran into a display of LorAnn Gourmet flavors and next to it, a recipe for hard candy. The rest is history. I made eight batches (clove, cinnamon, wintergreen, cranberry, lemon, English toffee, grape, and a swirled double batch of cheesecake and amaretto) to send to our family abroad, take to the department for Nikolaustag (a day late), and to munch on while puttering around the house. It's a REALLY easy process (except for the scoring and breaking parts) and kind of fascinating if you find sugar's behavior as mystifying as I do.
Hard Candy
  • 2 c sugar
  • 2/3 c light corn syrup
  • 3/4 c water
  • 1 dram (like in Shakespeare!) flavor oil
  • food coloring as desired
  • powdered sugar
  1. Mix the sugar, corn syrup, and water. Stir until sugar is dissolved.
  2. Insert candy thermometer. Bring sugar to a boil without stirring.
  3. Continue boiling mixture until temperature reaches 260 degrees or 'hard ball' stage.
  4. Add any coloring desired. Do not stir - the boiling distributes the color.
  5. Continue cooking until temperature reaches 300 degrees. Remove from the heat.
  6. After boiling stops, add flavoring and stir. BE CAREFUL because there will be a big cloud of steam that may or may not burn your lungs.
  7. Pour the candy onto a lightly greased baking sheet. Score the candy when it is partially cooled. Break candy along scored lines. This is where it gets sticky. Literally. I found a pizza cutter to be very useful. Basically, you want to score lines into the candy when it's cooled enough to hold a scored line. You just have to play around with it. I also found that a good, sharp, sturdy pair of kitchen scissors (like Joyce Chen) was good for cutting stubborn pieces. Just accept that your first couple of batches won't be very pretty.
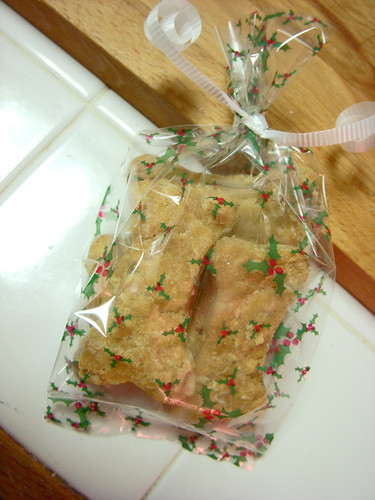
Our human relatives aside, there is one very special dog we won't be seeing over Christmas. I baked a batch of Blue Jean Gourmet's peanut butter dog treats for my Lucy, my parents' Poppy and Daisy, and one Bulldog named Oscar (pictured below). I can tell you already that Lucy, Poppy, and Daisy LOVE them.

12.02.2009

December, Day 2: Snowflakes and gooey cocktails

Part I

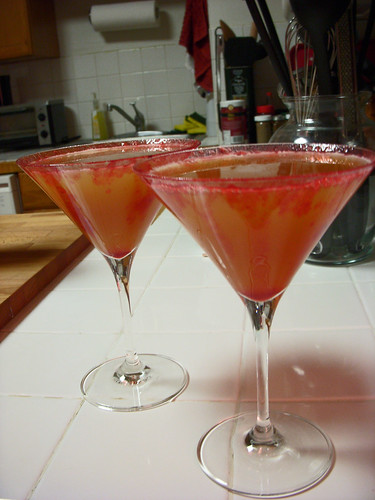
A few weeks ago Christine and I were canning cranberries. In an attempt to make jellied cranberries, we ended up with a few jars of cranberry goop. It's quite delicious, but not of a very useful consistency. Tonight I had the idea of using it to coat the rim of a cocktail glass. I turned to my trusty standbys - apple juice and bourbon - to fill the glass and topped it off with a little ginger ale. The goo sliding down into the glass was quite pretty before the cocktail was added, but it ended up looking a little bloody. Looks aside, though, it was delicious and henceforth it shall be called the Hard Candy Apple Martini. Make one ASAP.If you have cranberry goo to spare, that is. (Recipe on request.)

Part II
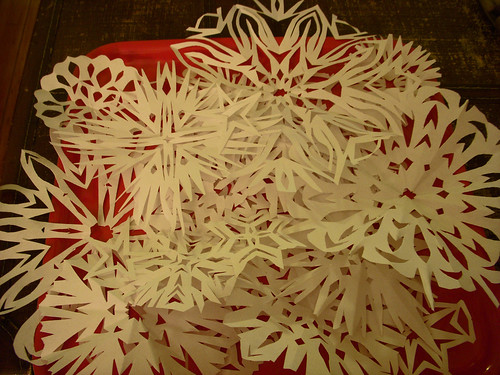
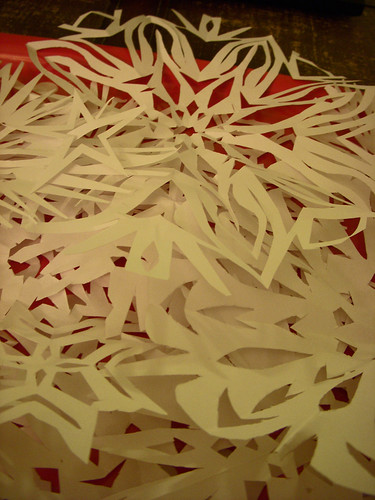
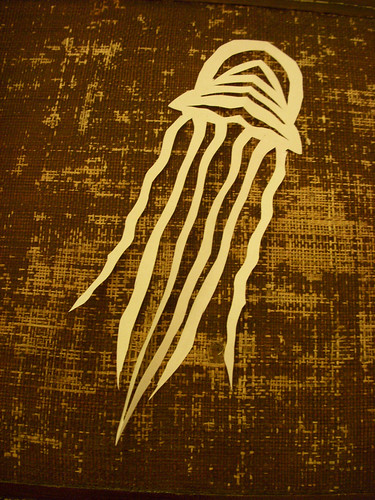
Last night I officially sent out the Holiday/Housewarming/Wedding/Birthday Party invitations (I've been threatening to have a big party for a couple years now, and I figured we could just combine all those reasons into one large multi-purpose party) and started obsessing today about the menu and decorations. I was in the decorating mood anyway, it being the holidays and me being in the holiday spirit, so I cut up a bunch of paper snowflakes and hung them all over the apartment.Midway through this project, Dan showed me this incredible video of GIANT JELLYFISH INVADING JAPANESE WATERS and I decided to make a paper jellyfish. It being the holidays, however, and me being in the holiday spirit, I decided to make it a festive jellyfish. A Jollyfish, if you will. I rather like him. I shall call him Oliver.
(Bonus points and your very own Oliver by mail if you understand that reference!)

10.10.2009

Sisterly nuptials, Part the first.


When a friend gets married, it's one thing. The preparations are all very exciting and the wedding itself great fun. But when one's only sister gets married -- that's something else entirely.

And so it was with my dear sister last weekend. She married a lovely, lovely man and, even though I'm not the kind who "always wanted a brother" (I was fine with just one sister, thank you very much), I'm very happy he's joined our family.

As the only sister and only bridesmaid to this particular bride, it fell to me to plan a number of fun things. First (and foremost), I helped the Bride plan the wedding. Second, I planned the Bachelorette party. Third, I planned and hosted the Bridal Shower.
So, when it came time to plan these events, I went way overboard. (At this point, it's appropriate to thank my long-suffering husband, who put up with a LOT on the bachelorette/shower weekend.) For the bachelorette party, I cooked a big hangover-prevention dinner and made some nice cocktails before the girls headed out to Cuchi Cuchi for a night on the town. (If you find yourself in Cambridge, in need of a cocktail, go there.)First: the cocktails. We're still working on a kicky name that has something to do with my sister's name or interests, but for now it's called the Mango Sunset.
Ingredients:
  • Mango Juice
  • Grenadine (I used homemade - recipe below)
  • Tequila
Mix the tequila and mango juice, then pour grenadine down the side of the glass so that it settles at the bottom and only slowly infiltrates the mango juice, hence the Sunset.

Homemade Grenadine is EASY to make and SO much better than the processed crap. Just make a simple syrup, but use pomegranate juice instead of water. Equal parts pom juice and sugar. Bring to a boil, boil until sugar completely dissolves and syrup forms, remove from heat. Done.

Then: The Pizzas.
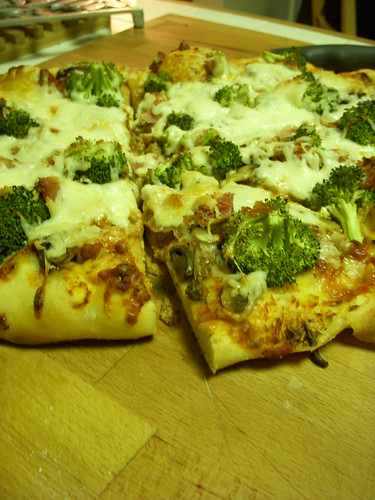
Unfortunately I didn't photograph the best of all the pizzas - the one for which I'm generously going to give you the recipe (which by all rights I should keep SECRET). I made three pizzas - a veggie pizza with Turkey Bolognese, a Three-Cheese Pizza (with the same Bolognese), and a Potato Pizza recreated after Number 5 at Cambridge, 1.

Potato Pizza (Yes, it sounds strange, but it is the most delicious starchy thing in the world).

Ingredients
  • 4 potatoes, peeled and washed; 2 sliced thin, 2 cubed
  • Dollop Sour Cream
  • 2 T butter
  • Fontina cheese in small slices
  • Part Skim Ricotta
  • Garlic
  • Big bunch fresh rosemary
  • Olive Oil
  • Pizza Dough (I bought some from Bertucci's, because I felt lazy)
  1. Cover the 2 cubed potatoes with water in a saucepan and bring to a boil. Generously salt water and cook until very soft.
  2. Meanwhile, preheat oven to about 400. Slice the remaining two potatoes very thinly
  3. Drain water from cooked cubed potatoes and mash with rough-chopped rosemary, butter, and dollop of sour cream. Set aside.
  4. Roughly flatten pizza dough on a well-oiled pan (or pizza stone, if you prefer). Brush top of dough with olive oil. Season with salt and pepper. Sprinkle finely chopped garlic over dough.
  5. Place potato slices on dough.
  6. Randomly drop dollops of ricotta (goat cheese would also be DELICIOUS) onto the dough. Distribute fontina slices across dough.
  7. Sprinkle more rosemary over the entire pizza.
  8. Bake at 400 until dough is golden brown and the cheese has begun to bubble and brown. Be sure potato slices are cooked through.
Note: Do salt very generously. The pizza will be bland with all that starch without enough salt.