Showing posts with label Winter. Show all posts

2.04.2010

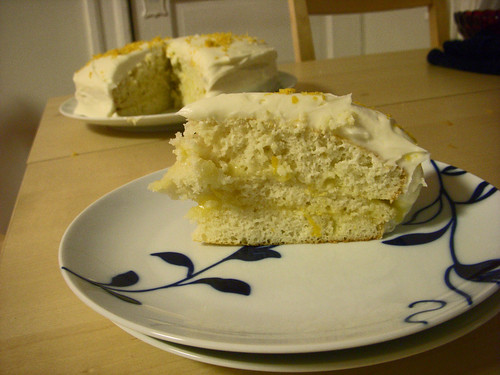
February Cake: Jamie's Belated Birthday


"Oh! certainly," cried his faithful assistant, "no one can be really esteemed accomplished who does not greatly surpass what is usually met with. A woman must have a thorough knowledge of music, singing, drawing, dancing, and the modern languages, to deserve the word; and besides all this, she must possess a certain something in her air and manner of walking, the tone of her voice, her address and expressions, or the word will be but half-deserved."
"All this she must possess," added Darcy, "and to all this she must yet add something more substantial, in the improvement of her mind by extensive reading."
This post is about cake, but first let's talk about my sister.My sister is, without a doubt, one of the warmest, most generous, helpful (to a fault) people you'll ever meet. Those qualities, paired with her massive intellect and unmatched way with words make her a formidable creature indeed. But for all that, she's also humble and kind and generally pretty fun to be around. (Oh, and isn't she pretty?)

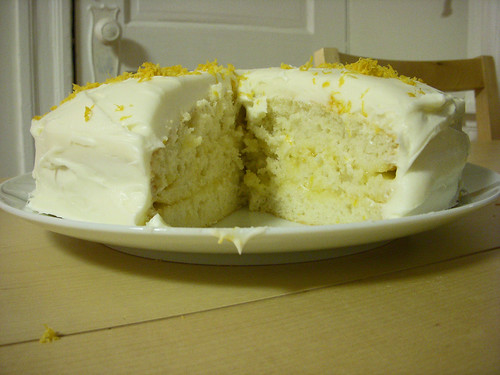
When it came time for her birthday to roll around this year, celebrations were put off for a little while, but it didn't seem right that she shouldn't have a party and a cake and all the good birthday-things. And then I remembered my 2010 Cake Project.So, the morning after her party, when we were all a little bleary-eyed, I concocted a plan, went to the grocery, and Jamie came over. We measured and mixed and baked and improvised a double boiler, debated the consistency of egg whites (shiny? firm? not dry?), and finally dug into one of the finest cakes I've ever had the pleasure of tasting, much less that I could claim as my own creation.

The other occasion for this cake was the arrival of some beautiful Meyer Lemons on my doorstep. In my debate on what to do with them, I arrived at the notion of filling a cake with lemon curd and began to salivate. That's just what we did.A note on the recipe. All the components for this cake came from Southern Cakes by Nancie McDermott. If you're at all inclined to bake cakes, buy this book. Although the components all came from this book, I'm going to go ahead and claim responsibility for the combination.

Jamie's Birthday Cake white cake with lemon curd filling and cream cheese frosting For the cake
  • 2 c all-purpose flour, sifted
  • 2 t baking powder
  • 1/2 t salt
  • 1 t vanilla extract
  • 1 c milk
  • 4 egg whites
  • 1 1/2 c sugar
  • 1/2 c butter, softened
  1. Preheat the oven to 350° and grease your cake pans (8" or 9" rounds, three if you have them) and line the bottoms with parchment. Grease the parchment.
  2. In a bowl, combine the flour, baking powder and salt. Mix well.
  3. In a bowl (or measuring cup) combine the vanilla with the milk.
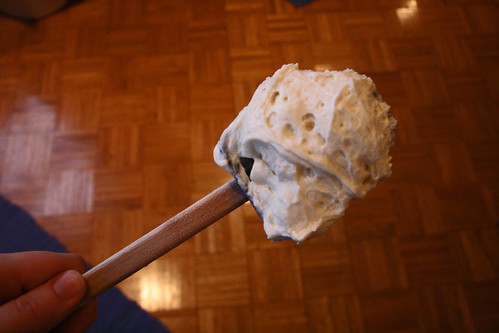
  4. In another bowl, beat the egg whites with a mixer at low speed until foamy, then beat at medium-high speed until they become shiny, thick, and stiff, but not dry.
  5. Then, cream the sugar and butter on high speed until light and fluffy.
  6. On low speed, add the milk and vanilla (DO NOT DO THIS ON HIGH SPEED. I've warned you.) and beat until blended.
  7. Add the flour mixture all at once and beat on low speed until the flour is incorporated.
  8. Fold in half the egg whites by hand with a rubber spatula until they are mixed into the batter. Fold in the remaining egg whites.
  9. Divide the batter among your pans (I only had two pans, so I reserved about 1/3 of the batter until after the first layers were done baking.) and bake for about 25 minutes. They should spring back when touched in the center and start pulling away from the sides of the pans. Keep a close eye, because they're not hard to over-bake.
  10. Cool on wire racks before assembling.
For the lemon curd filling
to do while the cake layers are baking
  • 3 eggs
  • 3/4 c sugar
  • 1/3 c fresh lemon juice (this was 1 Meyer Lemon for me)
  • 1 T finely grated lemon zest
  • 6 T cold butter, cut into small chunks
  1. For this you need either a double boiler or a heat-proof bowl that fits tightly into the top of a pan. I used a tempered glass bowl and a 2 qt saucepan.
  2. Bring about 3" of water to a simmer in the pan (bottom of the double boiler).
  3. While the water is heating, mix the eggs, sugar, lemon juice, and zest in the bowl (or top of the double boiler). Whisk so that the ingredients are well mixed.
  4. Cook the egg mixture over the simmering water, whisking constantly, for 8-10 minutes until it thickens and begins to look opaque. It should have the texture of lightly whipped cream.
  5. Remove from the heat and drop a few chunks of butter into the curd. Mix well until the butter has melted. Repeat until all the butter is incorporated.
  6. Cool until room temperature before assembling the cake.
For the cream cheese frosting to do while the cake layers and lemon curd are cooling
  • 8 oz cream cheese, softened
  • 1/4 c butter, softened
  • 1 lb confectioners' sugar, sifted (VERY IMPORTANT)
  • 1 t vanilla extract
  1. Cream together the cream cheese and butter with a mixer on medium speed.
  2. Add the confectioners' sugar and vanilla and beat at high speed until the frosting is fluffy and smooth. (DO NOT ADD THE CONFECTIONERS' SUGAR AT HIGH SPEED. You've been warned.)
  3. If the frosting appears too stiff to spread, keep beating. The volume will increase and the frosting will become fluffier and more elastic with more beating.
  4. You'll think there is too much frosting, but you'd be wrong. Pile it on.
To assemble the cake:
  1. Place bottom cake layer on a cake stand or pretty plate. Place strips of parchment just under the edges of the cake on all sides.
  2. Slather a healthy layer of lemon curd on top of the bottom layer. Avoid too much dripping on the sides, as it will make frosting the sides harder.
  3. Place another cake layer atop the first one and repeat the lemon curd slathering.
  4. Place the final layer atop the first one and begin piling on the frosting. First do a relatively thin layer on top of the cake, then carefully spackle the sides with frosting. I find that having too much frosting on your spatula or offset spatula or big knife (Chrissy! Bring me the BIG KNIFE!) makes it easier to spread without putting too much pressure on the cake.
  5. Once the sides are satisfactorily spackled, pile the rest of the frosting on top and distribute evenly on top and put more on the sides if you want. Don't mess around with it too much, though, or you will make a MESS.
  6. Decorate the top with extra lemon zest or dollops of lemon curd. Pull out the parchment strips from underneath the first layer and voila! you haven't messed up your pretty plate!
1.28.2010

Another ugly, but delicious dinner

Before we start, Happy Birthday to my dear mother! Go read her brand-new baby blog!

I got this great present for Christmas
- my mom and I both have copies of 660 Curries and I was lamenting just before the holidays that I wanted to cook more things from it, but I never have the right spices on hand (or enough cash in hand to stock up). So my parents made a list of all the spices I could need, went to Penzey's and stocked up for me. It was a truly inspired gift.

Anyway, this gift was given to me on condition that I start cooking more of the curries, so over the last month, Dan and I have been cooking our way through the book, trying at least five new curries since we got back early this month. All the recipes have been delicious (with one notable exception, where I somehow went awry with the salt, but we won't get into that), but the most interesting thing has been getting more familiar with the taste of all the spices and how they fit together.

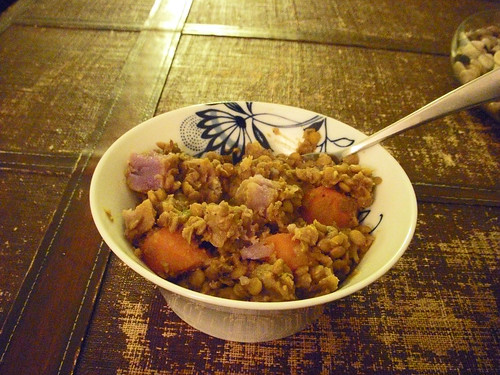
Last night we found ourselves in a bare-cupboard situation and I decided to make our traditional bare-cupboard dinner of lentil stew. We did, luckily, have beautiful vegetables that arrived in our Boston Organics box yesterday, so I threw in a few of them and let myself be sort of inspired by a recipe in the Curry Book. I didn't follow the recipe completely, as I didn't think to consult a recipe until after I started the lentils.

The result was a very delicious spicy, curry-y lentil stew which stood on its own and satisfied both of our very hungry stomachs with aplomb.

So far, I've used prepared spice mixes for most of the curries (I have three different garam masalas that I've been using), but I think this weekend I'll be spending some time making my own ginger paste, grinding up some of my own spice mixes, and maybe even making some spiced tomato sauce, so that I can actually sample the precise flavor profile of some of these recipes. I used to be so intimidated by cooking curry, but this book makes it totally manageable. If you're at all remotely inclined to cook curry, buy this book.

Spicy Indian/American Lentil Stew
Inspired by Five-Lentil Stew with cumin and cayenne - Panchmela Dal in 660 Curries by Raghavan IyerI call it Indian/American because I started off with the onion/carrot/celery combination that I would use to start any old American soup or stew, but ended with an Indian-inspired spice profile. I say spicy because I added cayenne twice. I'm not sure that was necessary. Feel free to dial it back to 1/8 t both times or just 1/4 t in the butter sauce at the end.

For the lentils
  • 1 small red onion, chopped finely
  • 1 stalk celery, chopped finely
  • 2 carrots, peeled and cut into 3/4 inch chunks
  • about a cup of dried lentils
  • 4 cups chicken broth
  • 1/2 t ground turmeric
  • 1 t grated fresh ginger
  • 1/4 t cayenne pepper
  • salt to taste
  • 4 fingerling (or 1 large) potatoes (I used purple ones!)
For the baghaar*
  • 2 T butter (ghee if you have it)
  • 2 dried bay leaves
  • 1 t garam masala (I used the garam masala I bought at Christina's)
  • 1 t cumin seeds
  • 1/4 t cayenne pepper
  1. Heatsome olive oil in a Dutch oven. When it's shimmering, add the onion, celery, and carrots. Saute until vegetables soften.
  2. Add the lentils (washed and picked over) and broth to the vegetables and bring to a boil.
  3. Stir in a little salt, the turmeric, ginger and cayenne.
  4. Reduce heat, cover and let simmer for about 30 minutes.
  5. When the liquid is mostly absorbed and the lentils are mostly softened, start the baghaar.
  6. Melt 2 T butter (or ghee) in a small skillet.
  7. Add cumin seeds, bay leaves, garam masala, and cayenne pepper.
  8. Reduce heat to medium and stir while the spices sizzle. When the cumin seeds turn dark reddish brown and start to smell toasty, remove from the heat. (Be very careful - it is EASY to burn the spices, which causes an unholy stink. Trust me.)
  9. Stir this mixture into lentils, add salt to taste and serve.
*my Curry Book tells me this is what it's called when you sizzle spices in ghee (butter in my case) to add to the dish at the last minute.

1.21.2010

Cook once, eat twice: Chinese dumplings and fried rice

It's cocoon-busting time around here at Darby O'Shea. Sure, January 1 was the beginning of the new year and September is really the beginning of the new School Year, but January 25 is the beginning of the new Semester. I've been holed up for the last few weeks, all but hiding from the world and recharging before things get started next week.

The break between semesters
has been lovely as just that, a break, from everything. I've been reading trashy novels (and good ones), watching movies, hanging out with the pup, and trying to pull myself out of the lingering end-of-semester and holiday coma - too much food, too many people, too much laziness for too long.As it is, I haven't been lazy about cooking, as such, but I have been exceedingly lazy about recording what I've cooked, how I've cooked it, and what it looked like. In the effort to shake off work-related laziness and get back in the swing of things, here we go.

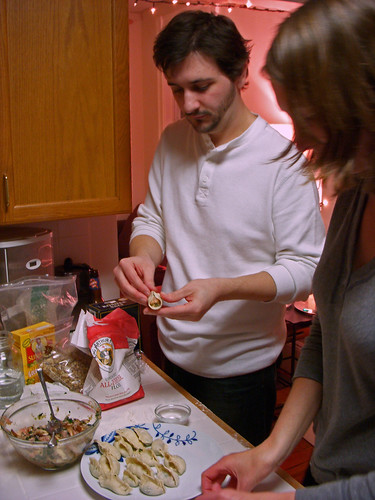
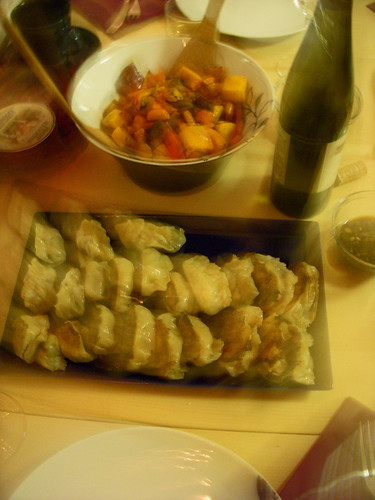
We had my dear friend Liz (home from school for a break) and her other half, Mike, over last weekend and I got all excited about showing off some wild cooking. I settled on a menu of salt-crusted Bronzini (that's a story for another day), roasted veggies with a sweet and spicy glaze, and Chinese dumplings as a starter. As soon as I saw the recipe for these dumplings in my latest issue of Fine Cooking, I knew I had (HAD) to try them.

The dough didn't come together *exactly* like the recipe said it would
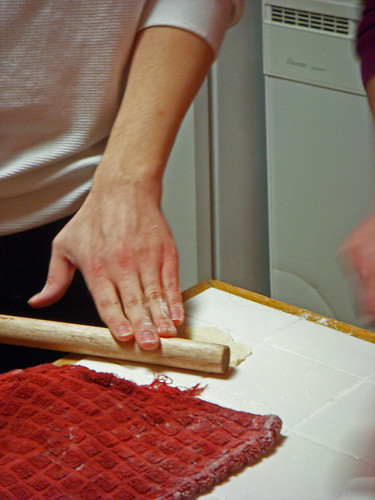
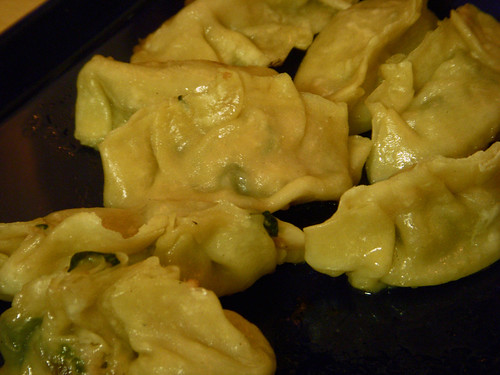
(in fact, it was a mess, but that could be due to my poor effort at precision), but it worked in the end. I started with the mound/well of flour and discovered that not only was it a little difficult, but I didn't have enough water. I put the flaky badness in a bowl and very aggressively forced some more water into the dough. After some frustrated kneading and letting the dough rest for the prescribed thirty minutes, I was pleased to see that it looked more or less like it was supposed to. The cutting and rolling of the dough went surprisingly well and proved to be a lot of fun with all four of us pitching in (even the boys, who aren't especially enthusiastic about kitchen matters, but who ended up up to their elbows in flour just like me).The filling I came up with was an amalgamation of the suggested fillings from the magazine. A little of this, a little of that, and the result was a tangy, hearty, delicious lump of joy wrapped up in tender, elastic dough. Combined with the soy dipping sauce recommended by the magazine, this was one of the most satisfying recipes I've ever tried.

The dough recipe is here and there are also videos showing how it's done. We followed the instructions for pan frying the dumplings, which was delicious. Highly recommend. Here's my filling recipe:
Pork and Shiitake Dumpling Filling
  • 1 lb. ground pork
  • 8 shiitake mushrooms, stems discarded and sliced thinly
  • 6 oz. spinach
  • 3 medium scallions, thinly sliced
  • 3 large cloves garlic, finely chopped
  • 2 T Mirin (I couldn't find the recommended Shoaxing)
  • 1 1/2 T grated ginger
  • 1 T soy sauce
  • 2 t toasted Asian sesame oil
  • 1/2 t sugar
  • pepper
  1. Combine 2 T water and the sugar to a boil in a skillet over high heat. Add the spinach and cook until wilted (about a minute). When the spinach is cool, squeeze the excess liquid from the leaves and chop finely.
  2. Mix the pork with the garlic, Mirin (or Shoaxing), ginger, soy sauce, sesame oil, and pepper.
  3. Add mushrooms and spinach to pork mixture and combine well.
  4. Chill filling mixture in the fridge for at least 30 minutes.
In my effort to Cook once and Eat twice, I used the cup or so of leftover dumpling filling to make a delicious pork fried rice (a rather brilliant suggestion from Liz). Here's a recipe.

Pork Dumpling Fried Rice
  • 1 c cold rice, preferably cooked the day before (I use brown)
  • 1 c leftover pork and shiitake dumpling filling
  • 2 scallions, finely chopped
  • 1 carrot, quartered lengthwise and sliced
  • 1 green pepper, roughly chopped
  • 1 white onion, chopped
  • 1 egg, beaten
  • leftover soy-scallion dipping sauce (or plain soy sauce to taste)
  1. In a hot wok or large pan, heat vegetable oil, then saute pork dumpling filling until no longer pink.
  2. Add onion, pepper, carrot, and scallions to pork filling, saute until vegetables begin to brown.
  3. Add rice and saute all ingredients until everything browns and begins to crisp.
  4. Make a well in the middle of the pan and add the beaten egg to the middle of the pan. Stir as it begins to scramble. Before it sets completely, stir into the rice. Cook until egg is completely cooked through and begins to brown.
  5. Just before serving, add the soy-scallion sauce to taste. Thoroughly incorporate, stirring constantly to avoid burning.

1.04.2010

2010, with a bang

Bear with me, this is going to be a long one.

Another new year, and so many new projects I want to undertake. Being still in school, the January to January calendar doesn't mean a whole lot to me. However, I like the chance at a second chance, midway through the academic year. As you may have noticed, I like taking stock and making grand plans - regardless of whether I live up to them or not.

This year, I find myself in an interesting position, both professionally and personally. In my work-life, I'm at the beginning of the big crazy research phase, and am in the process of hacking, warrior-like, into that hulking monolith of work. In my free time, I have finally harnessed some excess energy to be creative again. This is a welcome change and has both lifted my mood and given me a steady sense of accomplishment I haven't had in a long time. To take nothing and make something beautiful of it is a particular kind of excitement. (If only I could muster that kind of excitement for my research!)And, as you all know, cooking holds a similar position in my life these days. I've become enamored of the ingredients, the subtle, but flexible chemistry of combining them to create fluffy, puffed, creamy, or dense textures. The play of spice against sweetness against salt and soft textures against crunchy ones. And this blog has gone from a hodge-podge of more or less private thoughts to a much more public exploration of the things that fire my passions. It's been very exciting, making this little place grow and meeting a few of you readers as a result.Anyway, enough navel gazing.

This year, I'm going to try a few new things: I'm going to bring in more non-food photography. I may write about non-food things as well, if anything moves me to. On the food side, I'm going to look in some new directions. It turns out that I'm very very interested in heritage recipes - lost recipes, old recipes, recipes that aren't written down. After all, I'm always plumbing my own personal history, looking for recipes, finding anecdotes that associate with whatever I've just cooked. Part of that impulse surely comes from a Proustian search for the half-remembered, but unnamed taste of something from childhood, but part of it comes from a more academic interest in things past. Anyway, I've started rather aggressively buying old cookbooks and while I was home I spend a few hours copying recipes out of the old church cookbooks (bless you, United Methodist Women everywhere).
The other thing I'm going to do this year is bake more. I'm mystified by the way in which flour, eggs, and butter come together and make so many different textures and flavors and shapes. As well as baking more regularly, I'm going to do a monthly cake feature with recipes new and old.

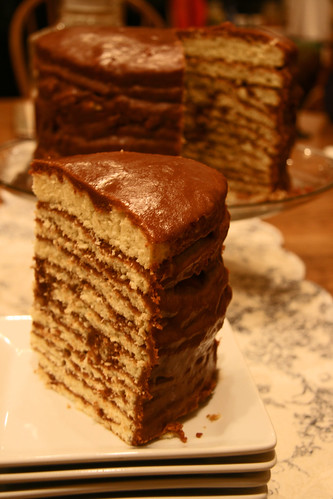
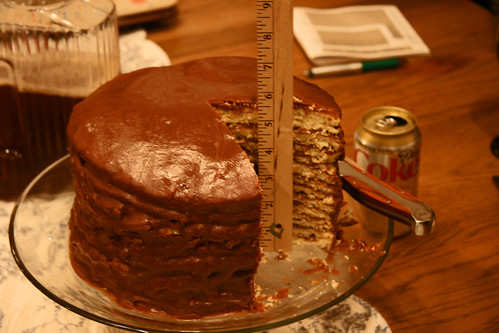
And the bang that I mentioned at the top was the first of the cakes: A Chocolate Little Layer Cake. I was inspired by the New York Times's article a few weeks ago about cake culture in Alabama. While the writer's style (as is so often the case with Yankee papers visiting the South) was a little condescending and leaning heavily on the exotic, the stuff of the article was very familiar and homey to me. I don't come from The South (or at least not that far South), but I grew up surrounded by those ladies. Granted, in my particular corner of the not-south, they all had German names and maybe made more pies than cakes, but the competition, the battle for bragging rights, the preposterous quantities of baked goods, all hit quite close to home.

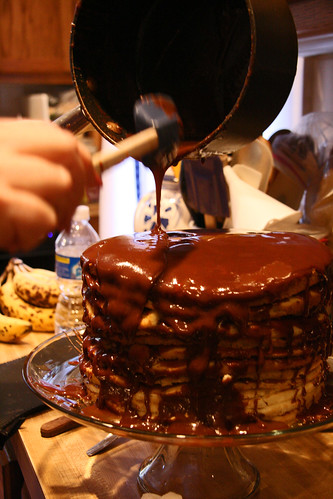
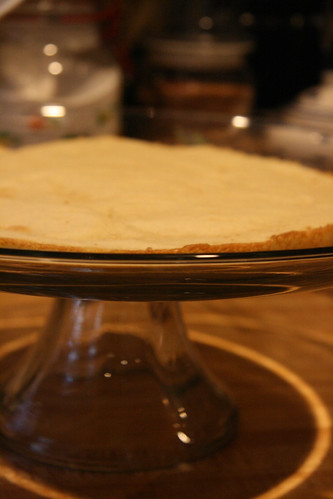
And coming, as I feel like I do, from that tradition, I am not to be outdone. So I baked the biggest and most ridiculous of those cakes, the 15 layer behemoth of the Little Layer Cake.It wasn't easy. Oh, it wasn't hard to make the batter (which was airy, fluffy, soft and beautiful - easily the nicest cake batter I've ever made), bake it (though juggling the hot pans was difficult), and make the icing (oh, it almost boiled over, but that doesn't count), but assembling it (Those little layers are about 1/4 inch thick and fall apart if you LOOK at them, much less try to flip them out of the pan, move them, and ice them while they're still warm.) to be anything better than hideous took time, nerve, and a little patchwork (ten layers in I had two major craters developing around the edges of the cake and I had to sacrifice a layer in order to patch them). The end result wasn't beautiful, but it was delicious and intimidating enough to make its point. Do not mess with this baker, it growled from its cake stand, too precarious to shout. This baker has no fear. This baker will eat you for breakfast.I particularly recommend this recipe for gatherings of more than ten people. Otherwise you'll have leftovers longer than you should. I should think it would also be good if you're having a new Southern mother-in-law over to dinner or looking to deeply impress someone equally important. Or, you know, for a Tuesday, because this cake, as well as being over-the-top and showy, is delicious! The layers are spongy and not too sweet, while the icing sets up to be something resembling fudge. Slicing the cake produces a little cracking feeling not unlike cracking a creme brulee (although the icing is not nearly as strong as that caramelized crust) and I've found little that will parallel the joy of smooshing crumbs of the cake into the icing that cracks off onto the plate. Oh, yes, it's a good cake.

Tips from my experience with this recipe, which I did not adapt at all.
  1. Do your best to spread the cake batter evenly on the bottom of your pans. It does not spread out and you will end up with holes in your layers if you miss spots. This becomes very difficult after you've baked one set of layers and your pans are hot.
  2. Use a bigger pot than you think you'll need for the boiled icing. It expands when it's boiling and has the potential for enormous mess.
  3. When assembling the layers, move quickly, with confidence, and try to line up the layers as precisely as you can.
  4. When icing the cake, be sure to completely coat all the layers. If you use too little icing, the layers won't adhere properly and you'll end up with big gaps around the edges.
  5. When icing the sides of the cake, the method I found most successful (as the edges are quite fragile) was to pour the icing over the top and drag the pools from the bottom up the sides. Don't think that you'll be able to spread icing around the sides. You won't.
  6. Don't worry about the number of layers you end up with. I ended up with 13 (I think), even though the recipe supposedly produced 12. The lady who provided the recipe ends up with 15. I don't know how.
(Also, welcome to the new www.darbyoshea.com! We're all official now! Update your bookmarks! Thanks for sticking with me!)

Other resolutions this year:
  • Project 365 - you can see what I'm up to every day over here.
  • Also, obviously, lose thirty pounds and make a million dollars.

12.21.2009

December, Day 21: Short on subtlety

I underestimated the amount of energy this blogging-every-day-thing was going to require. Snow-induced malaise combined with end-of-semester grading (DONE NOW, FINALLY) have dragged me away from the computer. I hope you'll forgive the delinquency of the last couple days, but when the world finds itself covered in a foot thick blanket of powdery white and I'm in the mood to watch Christmas movies, I'm unlikely (at best) to pry myself from the couch to do anything. This was just such a weekend.

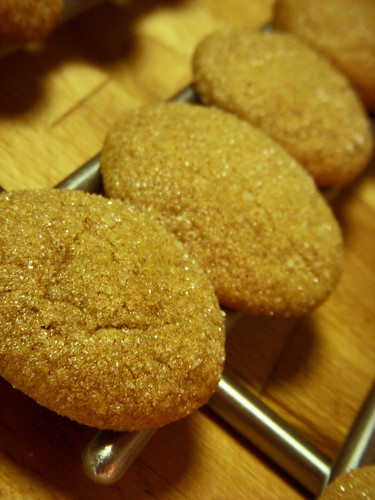
However, Sunday afternoon found me waking up (as from hibernation) and wanting a cookie. Specifically, I wanted one of the ginger sandwich cookies I baked for our party last week. So I peeled myself away from the couch and out from under the blanket and headed to the kitchen to bake.The recipe came from a Summer issue of Fine Cooking (yes, I agree these would be delicious on a picnic, but really, their spiciness and rich creaminess are SO perfectly suited to Winter, I'm not sure who thought to make them in June. Anyway, for the party I went with the recipe and made the filling a lemon cream. Yesterday though, I wanted something a little warmer, a little spicier. So I went with a cinnamon cream instead.

Also, (you could have seen this coming) the original recipe would have yielded a spicy, but mellow cookie and that just wouldn't do. So I doubled the measurements of all the spices and amped up the filling with some extra vanilla.

The resulting cookie? Not subtle. But just my kind of treat. These would be well suited to a cup of Bailey's hot chocolate, regular hot chocolate, warm milk (if that's your kind of thing), or coffee, just after dinner. Also, I recommend making the cookies as small as possible - bite sized would be perfect. As it is, my cookies turned out to be about a three-bite cookie, which is lovely.Ginger Sandwich Cookies
with Lemon Cream or Cinnamon Cream
adapted from Fine Cooking

For the cookies:
  • 2 cups unbleached all-purpose flour
  • 4 t ground ginger
  • 2 t ground cinnamon
  • 1 t ground cardamom
  • 1/2 t baking soda
  • 1/2 t kosher salt
  • 3/4 c unsalted butter, softened
  • 1/2 c packed dark brown sugar
  • 1/2 c granulated sugar; more for rolling
  • 1/4 c unsulphured molasses
  • 1 large egg, at room temperature
  • 2 t pure vanilla extract
  1. Pre-heat oven to 350. Line 3 baking sheets with parchment/silpat/butter (if you don't have the former options).
  2. Whisk the flour, spices, baking soda, and salt together in a bowl.
  3. Beat the butter and sugars together until light and fluffy. (I wonder if it wouldn't make sense to try the America's Test Kitchen 'reverse creaming' method to control the puffiness here...)
  4. Add the molasses, egg, and vanilla. Beat until incorporated.
  5. On low speed, gradually add the flour mixture and mix until incorporated.
  6. Turn the dough out, shape it into a disk (think about pie dough) and put it in the fridge for an hour.
  7. Put some sugar in a bowl.
  8. Roll small pinches (~1 t) of dough into balls and roll in sugar to coat.
  9. Arrange the balls on the baking sheets about 2" apart. (Original recipe suggests flattening the cookies with the bottom of a glass, which seems like a good idea!)
  10. Bake until the cookies feel dry to the touch and begin to firm up. Bake circa 13 minutes. (I have mixed feelings about how long to bake these cookies - I've both overbaked and underbaked them and every outcome has had pluses and minuses. The longer they bake - to a point, obviously - the better they look when cool, but they get really hard.)
  11. Cool completely on racks.

For LEMON Cream:
  • 4 oz. cream cheese, softened (I used 8 oz.)
  • 1 1/2 c powdered sugar (I used ~3 c)
  • zest of one lemon (I used twice that)
  1. Mix the cream cheese and lemon zest till smooth.
  2. Gradually add the powdered sugar and mix until smooth.
For CINNAMON Cream:
Same as above, but without lemon zest and WITH 1 1/2 T cinnamon (or to taste) and 1 t vanilla extract.

Assemble cookie sandwiches!

12.20.2009

December, Day 20: Snow


As you all know by now, the WORLD IS ENDING on the East Coast. For people who are "used to snow" they're acting like a bunch of pansies. I mean, a foot is a lot of snow for one night, but this is BOSTON, people. Anyway. I'm holed up and not going out today except to walk Lucy, who enjoys the snow more than most people I know. See the video above for evidence.

12.19.2009

December, Day 19: Delinquent

But it's so cold outside...

12.17.2009

I know, I know, you're all so sick of hearing about the party. But this recipe was SO good I just made another batch of it. So it's not just a party-recipe.
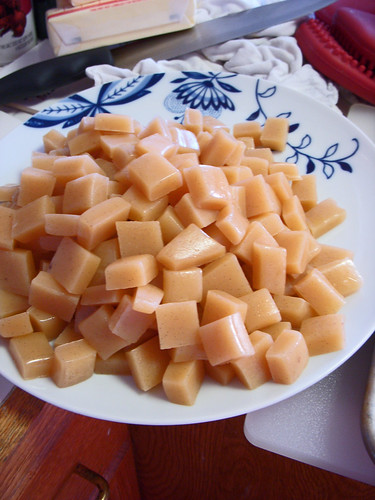
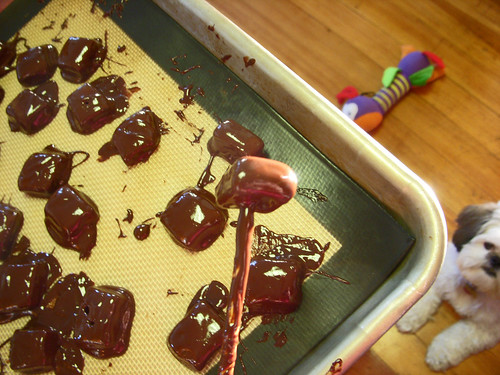
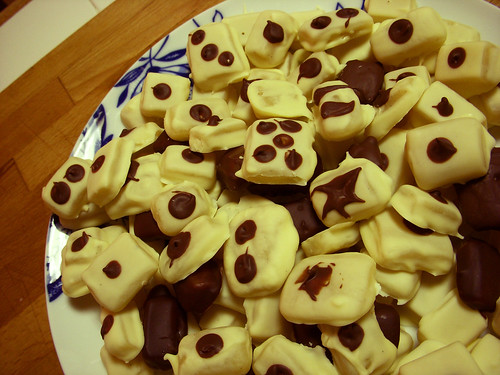
I've always had a giant-sized sweet tooth and have traditionally eaten candy of various sorts until I feel very ill every Christmas. My parents always set out dishes of M&M's (both peanut and plain - separately, because everyone's a purist one way or the other), Hershey's miniature bars (I love the Mr. Goodbar miniatures), and all kinds of other things. Walking through the house from kitchen to living room is like walking through a veritable minefield of chocolate. And that's not even to mention my dad's annual millions of batches of fudge. Mind you, I'm not complaining.

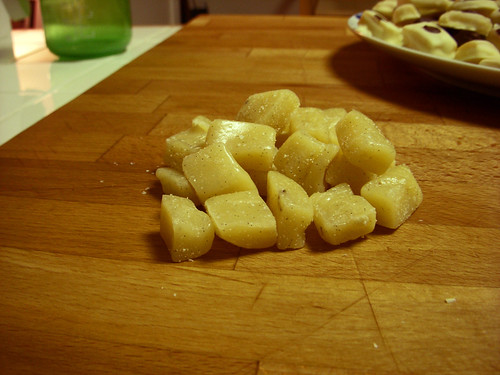
I thought I'd give my candy-making chops a try, and did so with these DELICIOUS chocolate-dipped vanilla caramels from this month's Food and Wine. A few tips from my adventure trying this recipe out:
  • GENEROUSLY oil the aluminum foil into which you plan on pouring the caramel to chew. It is a REAL pain when it sticks because you underestimated the stickiness of hot caramel.
  • Don't stop at the recipe's suggestion of bittersweet caramel for the dipping. I also dipped a batch in white chocolate, which resulted in a very sweet, but delicious treat. And when I got tired of dipping, I just salted the leftover pieces so they wouldn't stick together. Salted caramel = genius. but you all know that.
Try this recipe! So delicious.

12.02.2009

December, Day 2: Snowflakes and gooey cocktails

Part I

A few weeks ago Christine and I were canning cranberries. In an attempt to make jellied cranberries, we ended up with a few jars of cranberry goop. It's quite delicious, but not of a very useful consistency. Tonight I had the idea of using it to coat the rim of a cocktail glass. I turned to my trusty standbys - apple juice and bourbon - to fill the glass and topped it off with a little ginger ale. The goo sliding down into the glass was quite pretty before the cocktail was added, but it ended up looking a little bloody. Looks aside, though, it was delicious and henceforth it shall be called the Hard Candy Apple Martini. Make one ASAP.If you have cranberry goo to spare, that is. (Recipe on request.)

Part II
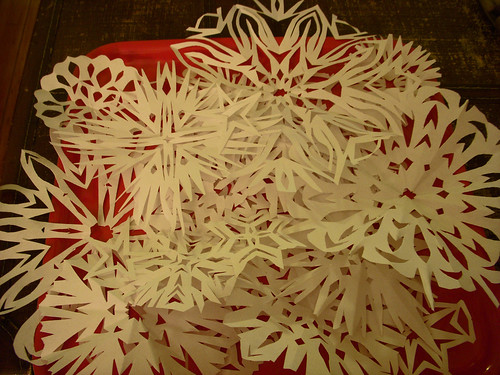
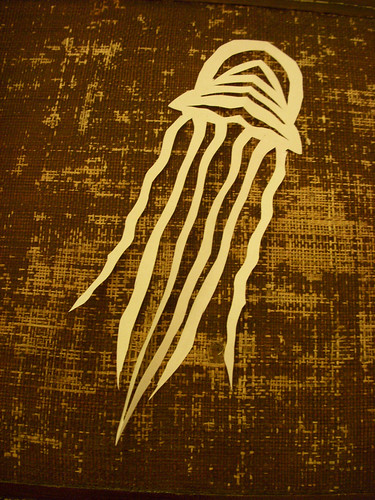
Last night I officially sent out the Holiday/Housewarming/Wedding/Birthday Party invitations (I've been threatening to have a big party for a couple years now, and I figured we could just combine all those reasons into one large multi-purpose party) and started obsessing today about the menu and decorations. I was in the decorating mood anyway, it being the holidays and me being in the holiday spirit, so I cut up a bunch of paper snowflakes and hung them all over the apartment.Midway through this project, Dan showed me this incredible video of GIANT JELLYFISH INVADING JAPANESE WATERS and I decided to make a paper jellyfish. It being the holidays, however, and me being in the holiday spirit, I decided to make it a festive jellyfish. A Jollyfish, if you will. I rather like him. I shall call him Oliver.
(Bonus points and your very own Oliver by mail if you understand that reference!)

11.20.2009

Spice Season Opening

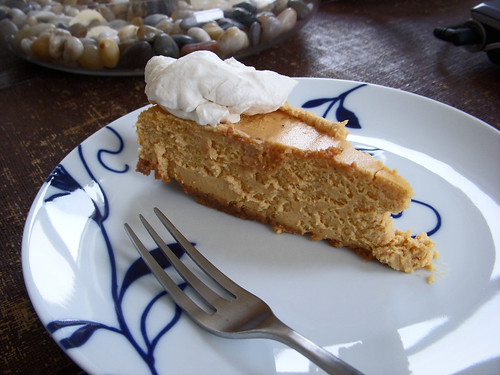
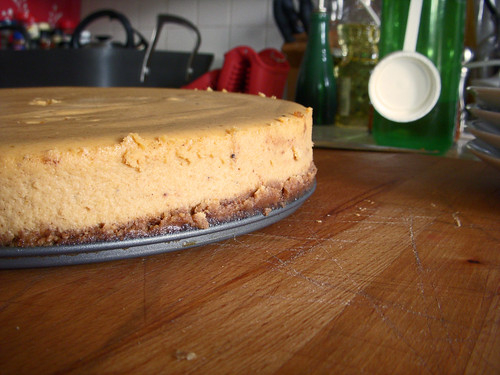
Recipe: Pumpkin Bourbon Spice Cheesecake with Bourbon Mascarpone Whipped Cream

Let this be known:
I do not buy into the phenomenon of coy female food guilt. I don't feel guilty about feeding myself good things. I don't feel guilty about eating sweets when they're around. If I do happen to binge a little (like the run-in I had with a pack of Oreos earlier this week), I don't make myself feel bad about it, though I do try to do better next time.

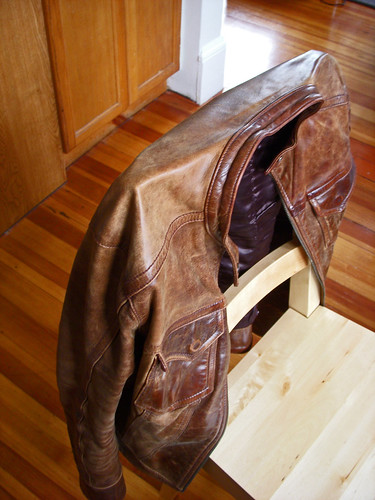
However, I increasingly believe in the value of delayed gratification. When I want to buy myself fancy, shiny new things, I do try to wait. In fact, there was once a jacket that I visited weekly for three months before allowing myself to buy it. Of course, when I did finally bring it home with me, I could barely afford food for the next couple of weeks. But wearing the beautiful, buttery thing around the house made me feel better about my growing hunger and dwindling bank account.Another thing I believe in delaying is my annual sugar-and-spice binge. From Thanksgiving through, approximately, February, I allow myself obscene quantities of all things involving any or all of the following: cinnamon, cloves, ground ginger, allspice. However, I don't really dip into these flavors until the third week in November. I like to keep these warm fuzzy flavors to the season in which they're most needed. Every year, it's worth the wait.
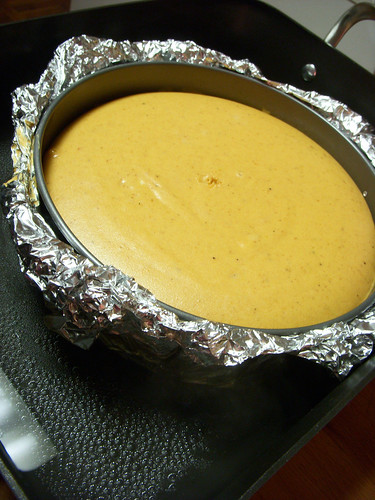
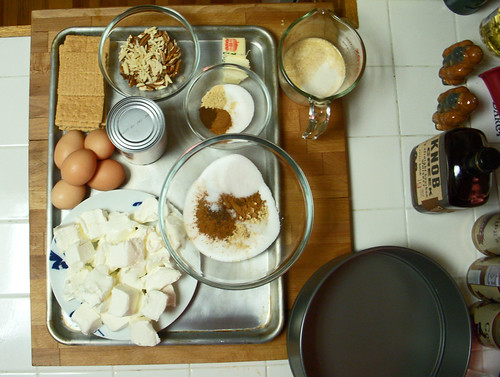
This year, I'm inaugurating the Spice Season with a new-to-me recipe: Pumpkin Bourbon Spice Cheesecake with a Spiced Pecan-Graham Cracker Crust. You got that right - the word SPICE appear TWICE in the title of this dish. That's the way we like it, this time of year.The recipe comes from Baking Illustrated, but I did tweak it a little, as I generally do. I decreased the sugar in the filling by about a tablespoon and added about a tablespoon of Maple Syrup at the same time as the Heavy Cream. (Maple's another exclusively Winter taste, as is pumpkin, obviously.) I also added almonds in an equal amount to the pecans in the crust. These things were good decisions.It turns out, this dessert is perhaps the greatest baked good ever known to man. It's creamy, spicy, sweet, and yet almost light (as light as cheesecake can be) and its crust is nutty and spicy and crunchy. The cream that I whipped up to serve with it is a dense, sweet, bourbony rich addition and every bit good enough to eat on its own. This cheesecake is kind of the sweet, supple, beautiful dessert answer to my lovely jacket. If I could slip into this cheesecake and wear it around, I would. It's truly spectacular. Make this for your holiday crowd. They'll thank you and you'll thank me.

Pumpkin Bourbon Spice Cheesecake with a Spiced Pecan-Graham Cracker Crust
adapted from Baking IllustratedFor the Crust
  • 5 1/2 graham crackers (3 oz.)
  • 1 oz chopped pecans (original recipe calls for 2 oz)
  • 1 oz slivered blanched almonds (my addition)
  • 4 T unsalted butter, melted
  • 3 T sugar
  • 1/2 t ground ginger
  • 1/2 ground cinnamon
  • 1/4 t ground cloves
  1. Heat the oven to 325.
  2. Butter the bottom and sides of a 9" spring form pan.
  3. Process crackers, nuts, sugar, and spices in a food processor until finely ground.
  4. Place crumbs into medium bowl and mix butter evenly into crumbs.
  5. Turn crumb/butter mix into the spring form pan and use the bottom of a drinking glass to press the crumbs evenly into the bottom of the spring form pan. Use a spoon to create a neat edge and press crumbs all the way into the corners of the pan.
  6. Bake about 15 minutes until fragrant and browned around the edges.
  7. Cool on a wire rack until room temperature.
  8. When cool, wrap the outside of the pan with a double layer of aluminum foil. Set the wrapped spring form pan into a roasting pan.
For the Filling
  • 1 1/2 c sugar (minus 1 T)
  • 1 t ground cinnamon
  • 1/2 t ground ginger
  • 1/4 t ground cloves
  • 1/4 t ground allspice
  • 1/2 t salt
  • 1 (15 oz) can pumpkin puree
  • 1 1/2 lbs cream cheese, cut into small chunks, at room temperature
  • 1 t vanilla extract
  • 5 large eggs, at room temperature
  • 1/4 c bourbon
  • 1 T maple syrup
  • 1 c heavy cream
  1. Bring about 4 quarts of water to a simmer in a stockpot.
  2. When the crust is done baking, whisk the sugar, spices, and salt in a small bowl and set aside.
  3. This part is ODD: line a baking sheet with a triple layer of paper towels. Spread pumpkin puree onto paper towels and place triple layer of paper towels on top. Press on paper towels until they are saturated. Peel back the top layer of paper towels. Flip the pumpkin onto a new layer of paper towels and repeat. Discard the towels.
  4. Beat the cream cheese at medium speed for 1 minute. To save myself typing, I will just say now that you should scrape the sides and bottom of the bowl as well as the beater after every step from here on out.
  5. Add about a third of the sugar mixture and beat at medium-low speed until combined.
  6. Scrape.
  7. Add half of the remaining sugar mixture and beat at medium-low until combined.
  8. Add the remaining sugar mixture and beat at medium-low until combined.
  9. Add the pumpkin and vanilla and beat at medium speed until combined.
  10. Add 3 eggs and beat at medium-low until combined.
  11. Add the remaining 2 eggs and beat at medium-low until combined.
  12. Add the heavy cream, bourbon, and maple syrup and beat at medium-low until combined.
  13. Pour the filling into the springform pan and smooth the surface.
  14. Set the roasting pan in the oven and pour enough simmering water to come about halfway up the sides of the springform pan.
  15. Bake until the center of the cake is slightly wobbly and the center of the cake reads 150 degrees on an instant-read thermometer, about 1 1/2 hours. (Beware, the cake can bake much faster depending on oven temperature and temperature of ingredients.)
  16. Set the roasting pan on a wire rack and cool until water is just warm.
  17. Remove the springform pan from the water bath, discard the foil and set on a wire rack.
  18. Run a paring knife around the inside edge of the pan to loosen the sides of the cake. Cool until barely warm, about 3 hours.
  19. Wrap with plastic and refrigerate until chilled. Up to 3 days.
serve with Bourbon Mascarpone Whipped Cream
  • 1 c heavy whipping cream
  • 1/2 c light brown sugar
  • 1/2 c mascarpone cheese
  • 2-3 T bourbon
  • pinch salt
  1. Mix mascarpone cheese with bourbon.
  2. Mix brown sugar and salt into whipping cream.
  3. Add mascarpone/bourbon mixture to whipping cream and sugar. Whip on high speed until peaks form.
On second thought, it would also be interesting to try substituting some maple sugar for some of the sugar in the cream. The maple taste I tried to introduce into the cheesecake was lost a little and putting it in the cream might be a good way to bring that flavor out without running the risk of changing the (perfect) texture of the cheesecake.

Vote for me! Go to the Bon Appetit Blog Envy Contest and vote for my cheesecake! Be sure to vote in all categories.

10.26.2009

Fall Ruminations

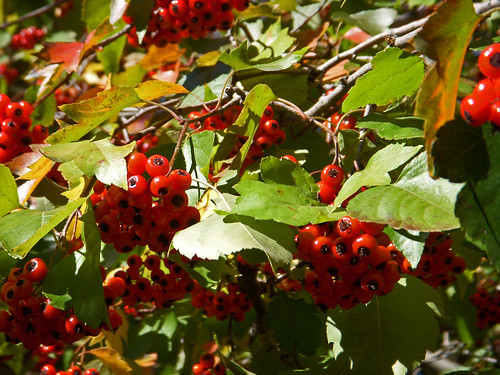
Fall has a way of making me think too much - about myself, about my work, about silly things and serious things alike. Today there are many, many thoughts percolating in my head and I'm struggling to put them all into words and onto paper. I've been thinking a lot about decay this Fall and trying to square the end of the year and the coming of cold weather and dead leaves with my growing need to be positive, warm, and happy.It's always too easy to get caught up in the idea that Fall means everything decaying, drying up, dying. I had a thought the other day, though, that maybe Fall isn't completely about things coming to an end. Maybe, just maybe, Fall is just an instance of potential energy. Yes, things fall off and begin to crumble in these first colder months, but part of the shriveling dessication also exposes seeds. So many of the things that appear and litter the ground in fall are berries, nuts, seed pods - things that spend the winter burrowing and being pressed into the ground, freezing, and eventually thawing to bud and sprout and bloom. All of this decay and dropping off is necessary, then, and is actually as much a sign of fertility and regeneration and progress as any flower in Spring.
I'm hoping this Fall and Winter can be something like that for me. I've got a lot of energy that's spinning off in unproductive directions and a lot of creativity that is pooling, unused, and beginning to fester. Hopefully I can start shedding some of my post-Summer malaise and something will find its way into the ground and by Spring, something will have taken root. No, I'm not going into hibernation, but hopefully some decay will give way to productivity.

************
In other news, I went to Maine with my family yesterday. It's always such a soul-warming place to go. I love driving around in the woods and suddenly peeking through to see the ocean and decrescendos of rock giving way to waves and blue water. Here are a few first photos - many more yet to come as the result of a little film and new-lens experimentation.(And yes, I'm well aware of the fact that everyone's pictures of fall foliage and ocean horizons look exactly the same, but there was something about yesterday that made photos I just can't get enough of. Feel free to not look, but I think they're awfully pretty.)