Showing posts with label friends. Show all posts

5.18.2010

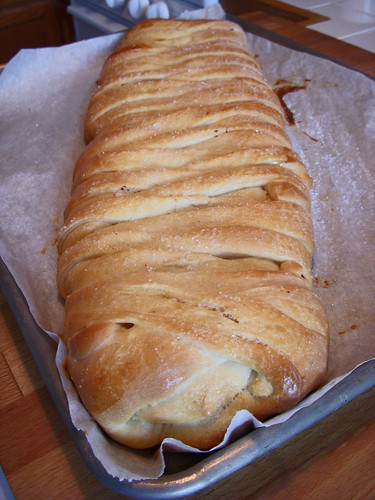
Bourbon Tasting Goodies: Braided Chocolate Sweet Bread

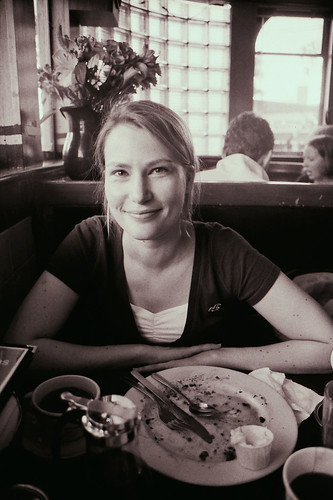
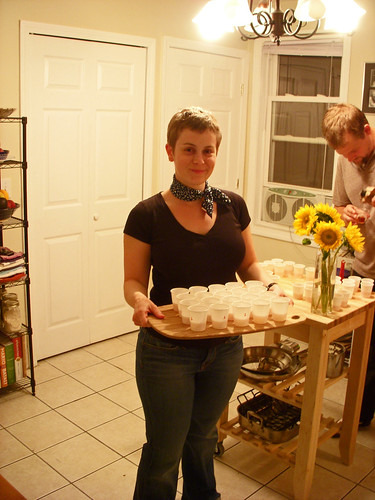
Last weekend we were invited to a bourbon tasting at our friends Sam and Andrea's house.  We're in a bit of a bourbon phase - delicious stuff, that - so we were really excited to go.  When I asked Andrea (that's her below, with all those little cups of bourbon) what I should bring, she requested something bready and filling to sop up some of the four different bourbons we tried that night.  I had just read a new post over at Smitten Kitchen and the recipe sounded awfully delicious and filling, so I plunged in.

I won't lie - I had issues with this recipe. I'm blaming the first (failed) attempt on dead yeast. Seems likely, in my kitchen. I may have overshot on the do-over, but so far, so good. Deb's suggestion on avoiding a sticky situation was well-conceived and, after seeing how tender and sticky this dough is, I give her full credit for saving me a vale of tears spilt over a ruined masterpiece.

I'll note the changes I made to the recipe after the first failed attempt, so you know how to go with me or go with the original, whichever you prefer.  My version will be in [brackets].  The instructions are based on Smitten Kitchen's, but I've heavily tweaked them.
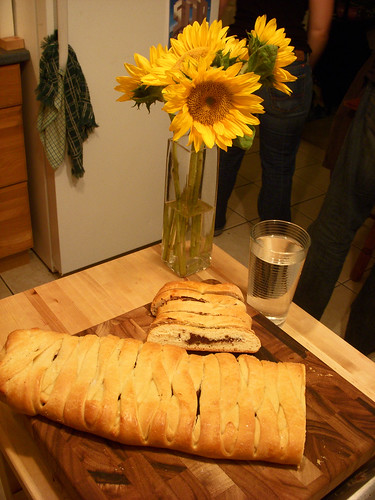
Braided Chocolate Sweet Bread  
Adapted from Smitten Kitchen, who adapted it from King Arthur

Sponge
  • 6 T (3 oz) warm water
  • 1 t sugar [2 t sugar]
  • 1 1/2 t instant yeast [after my yeast failed, I threw in a whole packet, so 2 1/4 t]
  • 1/4 cup (1 ounce) unbleached all-purpose flour
Dough
  • Sponge (above)
  • 6 T (3 oz) sour cream or yogurt [3 T sour cream AND 3 T plain, fat-free yogurt]
  • 1/4 c (4 T or 2 oz) unsalted butter, softened
  • 2 large eggs (beat one for the dough, reserve the other for brushing the dough)
  • 1/4 c (1 3/4 oz) sugar
  • 1 t salt
  • 1 1/2 t vanilla extract
  • 2 1/2 c (10 5/8 oz) unbleached all-purpose flour [plus up to 1/2 c more, depending on humidity]
  • [white sanding sugar for sprinkling]
Make Dough
  1. Make sponge: Whisk together flour, water, and sugar.  Add yeast and stir gently to combine.  Cover with plastic wrap and set in a warm place to proof for 15 minutes. 
  2. I made my dough in a stand mixer (*I'm told it can be done without! See below.): Beat together sour cream, yogurt, butter, egg, sugar, salt and vanilla until well blended.  
  3. Add the sponge and mix until well incorporated.  
  4. Add the flour 1/2 c at a time and mix with the paddle until the dough is rough, but the flour is incorporated.  
  5. Knead with the dough hook until a soft, smooth dough forms, about 5 minutes.  The dough should clear the sides of the bowl, but stick a little to the center of the bottom.  If your dough is too wet (i.e. doesn't clear the sides of the bowl, extremely sticky to the touch) add flour a couple of tablespoons at a time until the dough is cohesive.
  6. Place the kneaded dough in a lightly buttered bowl, cover with plastic wrap and set somewhere warm to rise for 90 minutes or until roughly doubled (or maybe a little less).
  7. While the dough rises, make the filling.
Sweet Cream Cheese & Chocolate filling
  • 2/3 c (5 oz) cream cheese, softened
  • 2 T(5/8 oz) sugar
  • 2 T (1 oz) sour cream
  • 1 t vanilla extract
  • 2 T (1/2 oz) unbleached all-purpose flour
  • 4 oz bittersweet chocolate
  1. Chop the chocolate finely and set aside (not someplace too warm - i.e. away from your oven).
  2. Combine cream cheese, sugar, sour cream, vanilla, and flour in a small bowl and mix until smooth.  For this to work, your cream cheese and sour cream should both be room temperature.  
  3. Set aside and check on your dough.
Assemble the beast
  1. Deflate the dough and roll it out on a generously floured counter to a 10″ x 15″ rectangle. Transfer rectangle to a large piece of parchment paper.  You may need help with this - have someone slide the parchment under the dough rectangle as you gingerly lift it.  If you don't have a spare set of hands around, I don't know why you couldn't just roll the thing out ON parchment.  
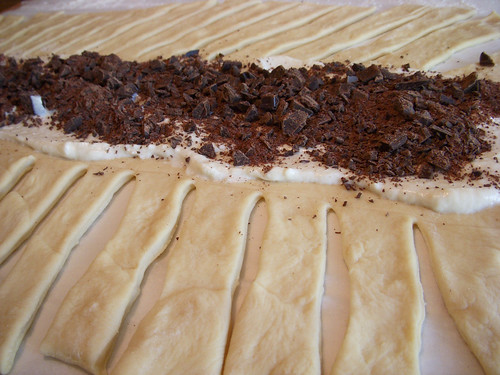
  2. Use a dough cutter or butter knife to mark two lines down the center of the dough, dividing it into three equal columns. Spread the cream cheese filling down the center section, leaving the top and bottom two inches free of filling. Sprinkle the chopped chocolate on top of the cream cheese filling.
  3.  To form the mock braid, cut horizontal strips (i.e. perpendicular to your filling) about an inch wide down the length of the outer columns of you dough (the parts without filling). Make sure you have an equal number of strips down the right and left sides. Use the dough scraper or butter knife to do this.  Don't cut the parchment paper.  
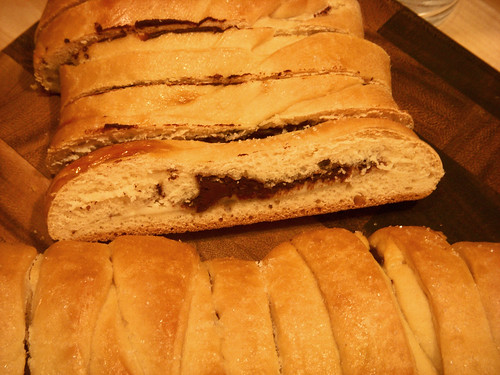
  4. To “braid”, begin by folding in the top and bottom strips, then folding the top flap down and bottom flap up over the filling. Lift the next dough strip and gently bring it diagonally across the filling. Be careful not to stretch the strips too much, as they will quickly become too thin and too long to do any good!  Repeat on the right side, and continue down the entire braid, alternating left and right strips until you are out. It should look roughly like a braid or a laced-up shoe.  
  5. Tuck any remaining ends under and call it a day.  It does not have to be perfect.  It will be impressive any way you do it.
  6. SLOWLY and carefully transfer the dough and the parchment paper to a baking sheet. Cover loosely with plastic and set it aside to rise for 45 minutes, until quite puffy.
  7. While the dough is rising, preheat the oven to 375°F. 
  8. After the rising is done, brush the loaf with egg wash, and sprinkle with sanding sugar. 
  9. Bake for 30-35 minutes, or until the loaf is golden brown. Depending on the depth of your oven, you may want to turn it midway through baking to ensure even browning. 
  10. Remove from the oven and cool for 15 to 20 minutes before serving.
*Make dough by hand: Whisk together sour cream, butter, egg, sugar and vanilla in a large, wide bowl. Stir in sponge. Add the flour and mix with a wooden spoon as best as you can; you may need to get your hands in there to form it into a shaggy ball. Turn ball of dough and any incorporated scraps onto a counter and knead until a smooth, soft dough forms, about 5 to 10 minutes. Place the kneaded dough in a lightly greased bowl, cover with plastic wrap, and allow to rise for 60 to 90 minutes, until quite puffy and nearly doubled.

5.05.2010

May Cake: Christine's Birthday Cake

It's always nerve-wracking to meet the significant other of a close friend.  So many questions: Will I like her?  Will she like me?  How will this change my friendship with my close friend?  What on earth will happen if we don't get along?

It's very easy at times like these to jump to a variety of worst case scenarios, but in my experience, it all works out for the best. I've had a lot of meetings like these - introductions that made me shiver with anticipation and nerves.  When I met my friend Seth's girlfriend Christine, it was no surprise that I was nervous.  The good news is we got along!  I liked her, she liked me.

And then they moved to town and things changed again.  How would this change things?  We'd be seeing each other all the time.  What if we don't actually get along?  What if we were just playing nice before?

But the even better news is that Christine and I really get along!  With time, it just gets better!  Blah blah like fine wine blah blah.  Seriously, she's awesome and I really like hanging out with her.

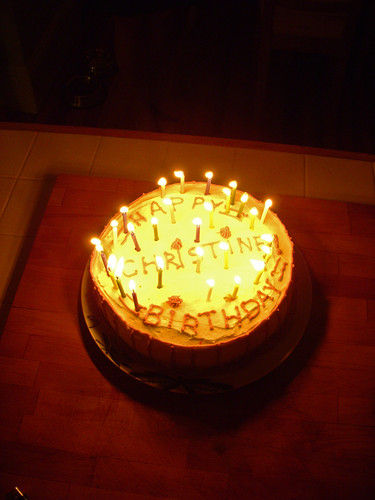
So when the time came to celebrate Christine's birthday, I was bubbling over to help with the preparations.  I baked up a crazy delicious and rather amusing birthday cake. 

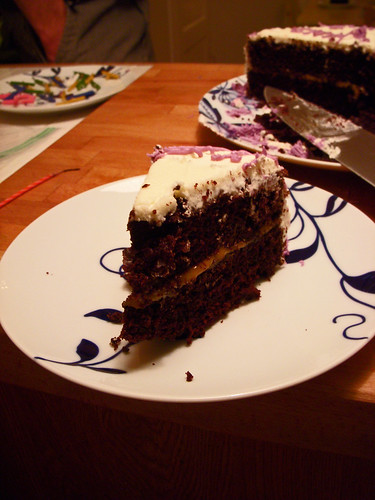
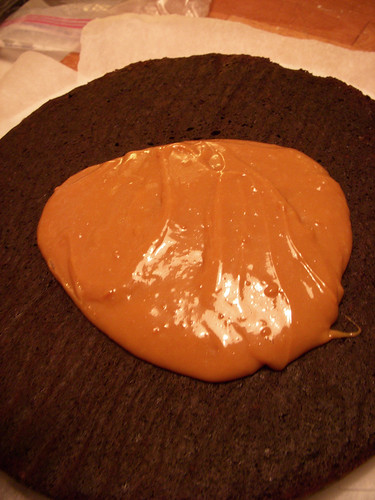
This time around I opted for a dark chocolate cake filled with homemade dulce de leche (I had a run-in with cake filled with dulce de leche at a wedding cake tasting a couple years ago and the memory of that first bite hasn't left me yet) and decorated with my mom's buttercream.  You see, while I was home a few weeks ago, I had my mom take me to the bizarre, but fabulous, cake-decorating shop in my hometown and help me outfit myself with some basic cake decorating tools (toys) and I couldn't wait to play with them.

The icing was tender and light, tasty enough to balance out the complexity of the dark chocolate and caramel of the interior.  Definitely a multi-layered flavor.

Should I cut to the chase?

It was a damn good cake.  Amusing, if not beautiful, and utterly delicious.

The Cake: Chocolate Mayonnaise Cake
from Nancie McDermott's incomparable Southern Cakes

  • 1/2 c cocoa
  • 1 c boiling water
  • 2 c flour
  • 1 c sugar
  • 2 t baking soda
  • 1/2 t salt
  • 1 c mayonnaise
  • 1 t vanilla

  1. Preheat the oven to 350.  Prepare two 9 inch cake pans (either with butter and flour or with Baker's Joy, which I've found failsafe of late - if you're going with butter and flour, also line the pans with greased parchment paper.).
  2. Mix the cocoa and boiling water in a large bowl and whisk well to combine.  Set aside to cool.
  3. Sift together dry ingredients.
  4. When the cocoa mixture is cool, add vanilla and mayonnaise and whisk well to combine (check for lumps!).  Add dry ingredients and beat until well blended and smooth.  Immediately divide batter into pans.
  5. Bake at 350 for 25-30 minutes until the edges start to pull back from the sides of the pans.  Cool completely in pans, then invert onto cake stand to assemble and decorate.

The Filling: Dulce de Leche
I used David Lebowitz's method for making dulce de leche, as I'm altogether too cowardly to boil a can of sweetened condensed milk.  Try it.  It's delicious.  Dangerously so.

The Icing: My Mom's Buttercream
  • 3 3/4 c powdered sugar
  • 1 c unsalted butter (softened)
  • 1 t vanilla (or more)
  • pinch salt
  • up to 1/4 c water (optional, if needed)

  1. Sift the powdered sugar.  Do it.  You'll regret it if you don't.
  2. Beat the butter until creamy.  Add powdered sugar and salt and beat until smooth and creamy.  
  3. Add vanilla and beat until smooth.  
  4. If it's still too stiff, add water by the teaspoon.

For piping buttercream, add more powdered sugar.  You want it to be very stiff.  Add color as desired and go crazy. 

3.15.2010

Clip Show: August and October

I've been trying to catch up with film processing and scanning - I had amassed a pile of a dozen or so undeveloped rolls and I'm working my way through. Last night I uncovered some very happy shots from August and October. The August roll almost fell victim to an accidental exposure situation (owing to a camera's dead battery) but luckily I salvaged the shots that were already exposed. They were of a lovely afternoon spent lounging on the summer roof, drinking fizzy cocktails and reminiscing about the past while debating the merits of a dozen potential futures. It was one of the more memorable afternoons of last summer, in fact, despite its uneventfulness.
The October photos came from an equally memorable day spent with my sister and my dear German Christine, brunching at the Town Diner and wandering around the Mt. Auburn Cemetery. It seems a little morbid, maybe, to find these cemetery shots as satisfying as I do, but there you go. I've always liked graveyards.

11.11.2009

Nostalgia Trip: On growing up, growing apart, and getting back in touch

I'm realizing that a lot of the cooking I do is motivated by a desire to return (at least gastronomically) home, to an earlier time. Most of the recipes that have excited me lately are ones from my childhood, things my mom cooked when we were little and the weather was turning cold.

The funny thing is realizing that nostalgic home-time is beginning to extend to include college, a time that I did not spend at home, a time when I wasn't yet cooking and when I wasn't regularly eating my mom's food anymore. It was a magical, now very far-away time, though, with hours spent idly sitting around, never short on fodder for conversation or making mudslides in a cheap blender bought at Wal-Mart and installed in our semi-functional and always filthy house kitchenette. Oreos, peppermint ice cream, and some milk carried back from the dining hall in a coffee mug. Or coming up with ways to make the sadly deteriorating pool table more functional.

How was it that we could just be in each others' company so easily? It seems like lately we've turned to watching TV or playing games or doing things to distract from the way things have changed. Are we becoming less interesting? Less close? Less talented at friendship? Is it just a part of growing up and shifting our attentions elsewhere (marriage, homes, money, children?) or is it some natural talent that we just grow out of?
Or maybe I'm just being pessimistic and short-sighted. Maybe the only difference is that we just have less time and it's less convenient, since we don't all live under one roof together. Maybe it's just that I spend all of my time at home just hanging out with my husband. Maybe we just need to clear our schedules every once in a while and just make time to be in the same place as the people we love, doing nothing.

This is precisely what I did with my dear K on Sunday. We had brunch (oh, so grown-up), and then we hung out at my house, looking at Vogue, flipping through cookbooks, chatting about nothing in particular. Then we went to the supermarket and reminisced about making mudslides while buying the ingredients to make one of my most nostalgic treats.
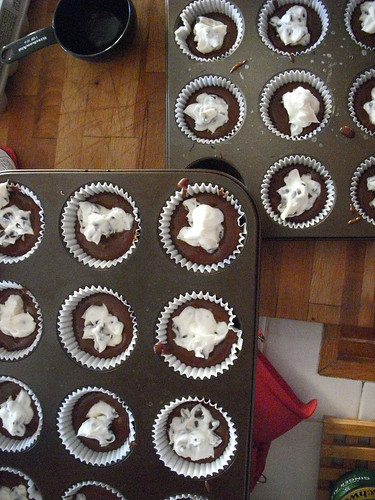
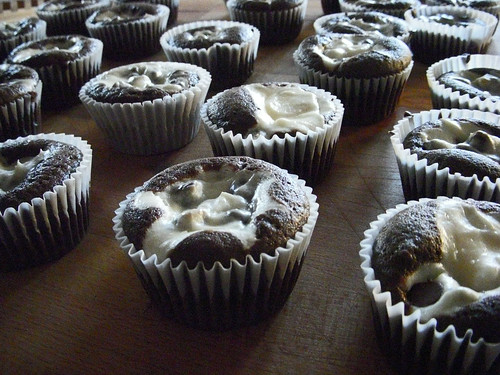
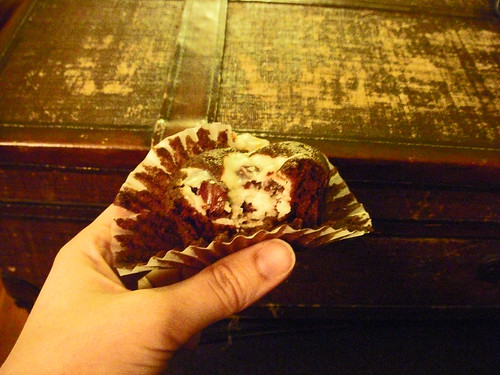
My memories of these cupcakes (many childhood birthdays, random winter days, special occasions that warranted cupcakes) are densely layered on top of one another and now I'm happy to think that I've added another Black-Bottom-Cup memory to the pile. Now these are the cupcakes that I grew up on, but also the cupcakes I grew back down with. They were there as I was lunging toward adulthood, but they also accompanied me and my friend on a little trip back in time to the days when we lived together, boys took up less of our time, and just killing time was the sweetest thing we could do.
This little baking afternoon helped me reconnect with one of my dear friends and also with an earlier version of myself, but I'm dedicating this post and the recipe (thanks as ever, mom!) to all the friends I used to sit around with, go on long Mill River walks with, nap with, do homework with, and grow up with. I miss you all desperately and hope that one day we can kill time and shoot the breeze together soon. Meanwhile, bake these and think of me.

Black Bottom Cups

Filling:
  • 1 8 oz package cream cheese
  • 1 egg white
  • 1/3 c sugar
  • pinch salt
  • 1 6 oz package semi-sweet chocolate chips
  • 1 t vanilla
  • ½ t almond extract
Combine ingredients except for chocolate chips in a small bowl and mix well. Stir in chocolate chips and set mixture aside.

Batter:
  • 1 c sugar
  • ¼ c cocoa
  • 1 t baking soda
  • 1 ½ c flour, sifted
  • ½ t salt
  • 1/3 c vegetable oil
  • 1 c water
  • 1 T vinegar
  • 1 t vanilla
  • chopped nuts (optional)
Sift dry ingredients together. Add remaining ingredients except (optional) nuts and mix well. Fill paper muffin cups 1/3 full with chocolate batter. Top each with a heaping teaspoonful of cream cheese mixture. Sprinkle with nuts. Bake at 350 for 25-30 minutes. Makes 2 dozen.

10.12.2009

Fall Break

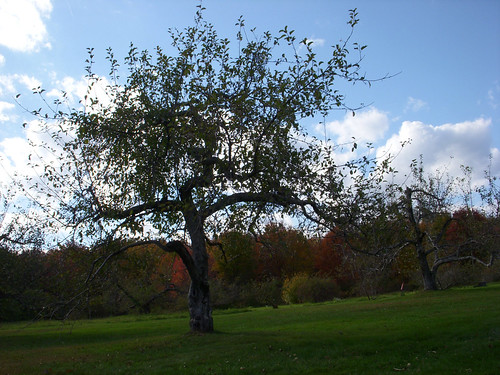
Yesterday, Dan and I and the Little Dog took our annual Fall trip out West to Northampton and environs. We were out for a little leaf-peeping, a little escapism, and a little taste of the Autumn That I'm Having a Hard Time Getting Used To (TM).
Fig. 1. Leaves were peeped. Though I didn't get any really spectacular photos of blazing trees or impressionistic hills, I think this fall is the most spectacular I've seen in a long time. I guess that's a good reason to be thankful for the cold snaps of the last couple weeks, yes? Fall always makes me all shades of nostalgic, and never more than when I'm taking the fall drive out to Northampton. There's this one rise in the road on the Pike near Brimfield that affords an amazing sloping view down into the valley as you come over the top of it. I know I don't live out there anymore and it's likely to be some time before I live out there again, but it always feels a little bit like coming home. There's simultaneously a drop in my stomach and a bubbly feeling of excitement that never fails to make me feel choked up. The same thing happens to me after turning onto 91 North, after passing the Holyoke Mall, when it starts to look more like Northampton. The view out across South Hadley just south of Mt. Tom is another spot, as is the first view of the Connecticut river, just before Exit 18. And the whole Pioneer Valley is speckled with spots that make me catch my breath and want to cry happily, and yet out of a sense of nostalgia for lost experiences and fading, but still warm memories.
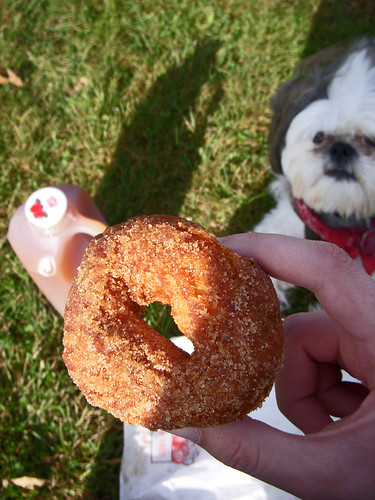
Fig 2. Cider Donuts were consumed. These were still warm when I bought them. Still warm. It was the kind of day where there was a line waiting for the donuts to come out of the kitchen. Crispy on the outside, sugar and cinnamon crackling with each bite. Little puffs of cider-y steam. Divine. If anything tastes like fall, it's these donuts. We enjoyed them with a half gallon of cider that we drank from the jug. A perfect meal, all in all.
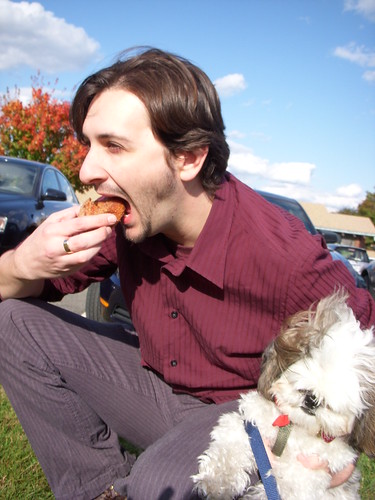
Fig. 3. Dan ate some donuts too.
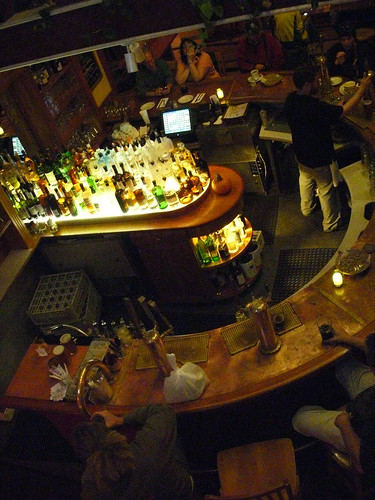
Fig. 4. We drank delicious beers at the Northampton Brewery. I had an 8 ounce (very petite) Hoover's Porter, which was one of the finest beers that has ever passed my lips. Why, oh why don't they sell it in bottles?!Fig. 5. As we hit the road back home, we made a pitstop for a strawberry shake at the Whately Diner. This was another college haunt and definitely a place I wanted to share with Dan - he's also a big diner fan. The pink neon glow and the shiny metal of the diner's exterior is frozen in time, I think. It's fabulous, but still somehow unsettling. Dan said it seemed like an X-Files episode should have been happening around us. It's true. Places that stay static while the people who inhabit them (however temporarily) are uncanny. Places that change, although we expect them to stay the same, however, moreso.

More photos here.

9.08.2009

Jellies and jams and pickles, oh my!

**A lot has happened since I began writing this post. I'm sitting in my mom's hospital room now, as I finish it. She's on the mend, but it's been quite a scary few days. So, this post is for my mom, with whom I look forward to many, many years of canning, cooking, and all those good things.

I remember many Augusts of my childhood, especially in those early, pre-preschool days, spent as my grandmother's and mother's side while they (we, I thought) canned the mountains of vegetables that my grandpa coaxed out of the earth in his garden (which was, gothically, located on the State Hospital grounds). Hour after hour, just as the Summer heat peaked for the year, leaving most of us breathless, they'd stand over the stove, milling tomatoes into juice (which would become vegetable soup or chili when Summer's sweat became a distant, almost longed-for memory), stringing, trimming, and finally packing green beans into quart jars, ready for the pressure cooker.

I remember (fondly) helping by peeling the wax pencil and writing dates on the lids as they came out of their hot bath. I remember dozens of jars of tomato juice and beans, and in a few banner years, hundreds, lining the shelves under the basement stairs in my grandparents' house, where it was cool and dark and there were commonly spiders. I took a special pleasure in sneaking into that small space and scaring myself out of my wits at the thought of spiders and other unknown things creeping out of the dark.
At some point, I grew bored of watching the women in my family putting up Summer produce for the Winter. At some point my grandpa stopped gardening on such a large scale. And at some point my grandma stopped canning and this all became relegated to memory, a somewhat peculiar habit held over in my family by those Roosevelt Democrat elders who were worried about potentially lean Winters, even though we always had more than enough to eat in our homes.

I suffer no illusions that my canning now will make up for the years I missed canning with my grandma while I could have, but trying my hand at it makes me feel a little closer in a tiny way. In my case, there was only a very little salt and no tomatoes in sight and I shied away from the pressure cooker (I have visions of Arroz con Pollo stuck to my ceiling - and if you don't know what I'm talking about, look it up) and decided to give jelly and jam a go. (And pickles, but I can't take credit for that idea - more about that later.)

Remembering what seemed to a very small child to be a very large production, I decided to tackle this task with help rather than on my own. Luckily, my newly-minted-Somervillian friend Christine was excited at the prospect of giving all this ridiculousness a go and we spent today up to our elbows in brine, pectin, and produce.
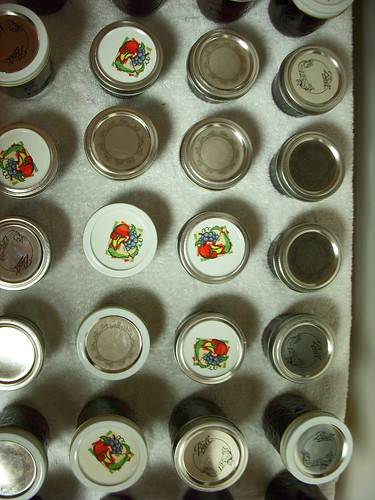
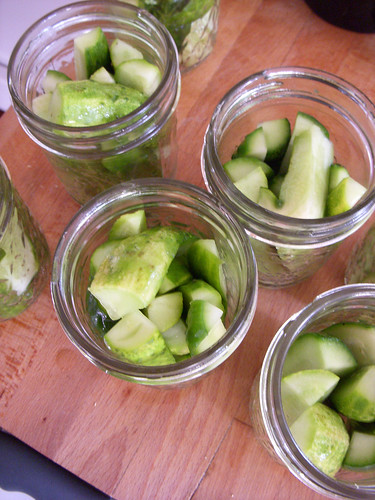
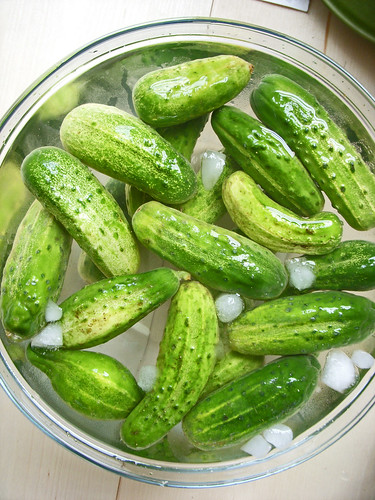
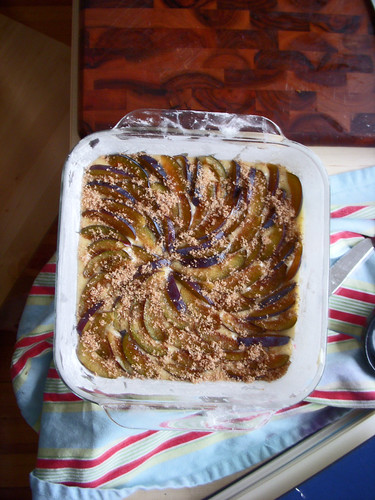
Experiment #1. Dill pickles. Christine expressed a great deal of interest in trying to can pickles. So, we stopped off at the Harvard Farmers Market and bought 20 or so pickling cukes and a big handful of dill. With a few mishaps on the way (dill pickles without the dill, briefly, but caught in time), we managed to make eight beautiful jars of tiny dill pickles, steeping (mellowing?) away in a fragrant, herby brine.Experiment #2. Grape Jelly. One of the finest things about the apartment where the Brit and I are living now (since May) is the beautiful back yard that we share with the other five apartments in our little corner of Cambridge. There is a rather stunning grape arbor that, this Summer, became overburdened with a bumper crop of big, fat, purple Concord Grapes. Christine and I went out, armed with one puppy and two big grocery bags and picked, conservatively, 15 pounds of grapes. Our recipe called for three pounds of grapes, with the goal of producing 4 cups of grape juice (but you can add a little water if you don't have enough). Our three pound batch rendered more like eight cups of juice, so we ended up making two batches of grape jelly. And there's about 12 pounds of grapes in the freezer, waiting for a (cooler) rainy day. Result: many, many jars (of both 4 oz. and 8 oz. varieties) of grape jelly.Experiment #3. Spiced Plum Jam. The Harvard Farmers Market also boasted a lovely array of late Summer produce, of which we selected Plums as our final ingredient of the day. As the chopped, pitted plums cooked down into a happy, syrupy slurry (Thank you, Seven Spoons, for the phrase "a warm slurry of bacon and sweet shallots" which reminded me that slurry can be a good word, too.), I decided to add some spice. "I feel like some spice would make sense with plums," I said to Christine, already a little delirious from the jars upon jars of grape and pickles we had done, and I threw in some ground cloves and ground cinnamon. Suddenly it smelled like Christmas and I knew it was a good idea.**Note: While we had plums on hand, I made this plum cake. It was delicious. This picture is before baking.After eleven hours of this business, with aching feet and back, and more than one burned fingertip (and a couple burned spots on face and feet from flying, boiling jelly), I can say with confidence that canning is a LOT more work than you think it is, no matter how much work you think it is.

Also, I can't wait to do it again.

8.24.2009

Summer winding down

The last few days of Summer are still ahead of us, but with the semester (and teaching duties and looming research) starting next week, I find myself prematurely nostalgic. It seems like just minutes ago that it got warm and only a couple of weeks ago that I finished grading and put away my teaching persona for the year. But today I went and excavated my desk in preparation for another Fall and I can feel the last few minutes of freedom slipping away.

Unfortunately, the copious free time I granted myself this Summer is slipping away with the last few weeks of warm weather. And with that free time goes the time I've spent cooking and baking and developing film and scanning negatives and writing these blog posts. Doesn't mean I'm not coming back, though. It just means that the recipes will be more carefully chosen and the photos worth a few more than 1,000 words on average (hopefully).

This past weekend was the last big hurrah of the Summer, featuring my best friend's wedding to a lovely guy. I was busy doing bridesmaid duty, so I've no recipes to share. However, I appointed myself the unofficial photographer of the three days' events and took a few hundred photos. Here's a selection of the best ones. Hopefully a few more posts and recipes before work descends and it's all to-do lists and moaning about the waning afternoon light. Don't give up on me!

8.03.2009

A slice for a friend

There's this girl I'm thinking about a lot today. She's an incredibly strong, talented, happy, generous, and generally fantastic person who's coming to the end of what I understand to have been a really, really rough year. She's also an absurdly good writer and a creative and talented cook. And she takes good photos. What I'm trying to say is that she's quickly ascending my list of Inspiring People.

One thing that makes her blog memorable (among many many memorable things) is the occasional post she dedicates to someone she's thinking of or who has a birthday or needs cheering up. So, I'm going to unashamedly copy her and say, Jess, this post is for you!

Jess is creative and thoughtful in just about everything she does and she definitely doesn't seem to be the type to be afraid to try something new. So, I thought, wouldn't it be fitting to pay her a little tribute and do something creative and new and be unafraid about it. So I decided to make quiche.

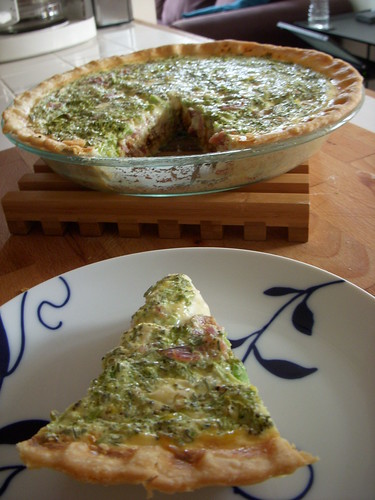
Yes, this is not a new dish. I'm not inventing something earth-shattering (Don't get me wrong, quiche is earth shattering, but I can't take credit for it, alas.), but I've never made it before and I've always been slightly intimidated by the prospect of it. But today I closed the book of fraidy-cat-ness and plunged right in. Thanks, Jess, for the inspiration. We're thinking lots of warm thoughts for you and we'll save you a slice till you're back to the blogs. Happy Humpty Dumpty Day!

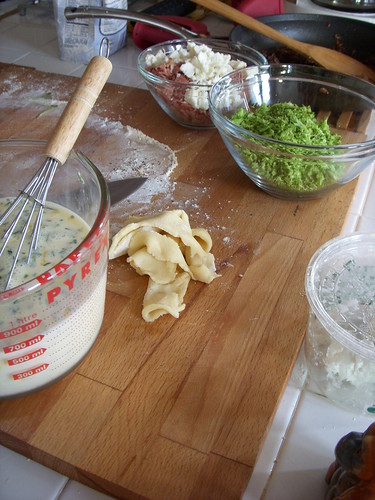
Quiche with all the goodiesIngredients:

for the crust
  • 1 1/4 c flour
  • 1/2 c (1 stick) butter, chilled
  • 4 T ice water
  • 1/4 t salt
for the filling
  • 5 eggs
  • 1 c whole milk
  • 1 c half and half
  • salt and pepper
  • handful fresh rosemary, chopped
  • 2 small onions
  • 1 small head broccoli
  • 5 slices prociutto
  • small block feta
  1. Make the crust. As with pie crust, process the flour, salt, and butter in a food processor until crumb-like in consistency. Add ice water and process until dough ball starts to form. Form dough into flattened ball, wrap in plastic, and refrigerate for an hour.
  2. Meanwhile, slice the onions thinly, either by hand or in the food processor. Heat olive oil and 1 T butter in a pan and stir in the sliced onions, salt to taste and a spoonful of brown sugar. Cook on medium heat, stirring frequently, until the onions have fully caramelized and are dark brown in color. Set them aside.
  3. Chop the prociutto, broccoli, and feta quite finely, either by hand or in the food processor.
  4. Roll out the pie dough and press into a quiche or pie pan (I used a glass deep dish pie plate).
  5. Bake the pie dough for 5 minutes at 375.
  6. Meanwhile, beat together the eggs, milk, half and half, rosemary, salt and pepper.
  7. Remove the partially baked crust from the oven and spread dry fillings (cheese, prociutto, broccoli, onions) in the crust.
  8. Reduce oven temperature to 350. Place the filled crust back onto the middle rack of the oven and pour the egg mixture over fillings up to about 1/4 inch from the top of the crust.
  9. Bake the quiche for about 45 (40-50) minutes or until a) crust is golden brown, b) a knife inserted about 1" from the edge comes out clean, and/or c) the middle is set, but still a little jiggly, like jello.
  10. I like to let it cool a little and serve it up while warm.